Overview
This guide provides a detailed, step-by-step process for building a custom contact form that emails submissions to the site admin using ChronoForms8 in both Joomla and WordPress. It covers installation, form creation, field configuration, email setup, and testing, while also introducing ChronoMails for advanced email management. Following these instructions ensures a functional and professional contact form for your website.
Adding a contact us form in Joomla or WordPress is straightforward with ChronoForms8, a versatile form builder that creates custom forms with email functionality. This step-by-step guide shows you how to build a Joomla contact form that emails form submissions to the site admin, and how to use ChronoForms8 in WordPress too. We’ll also introduce ChronoMails, an extension for advanced email management.
For a detailed overview of ChronoForms8, check this official tutorial.
Step 1: Install ChronoForms
Make sure that you have ChronoForms 8 Joomla form builder installed
Step 2: Create a new form in ChronoForms 8
In the ChronoForms8 forms manager, click New to create a new form.
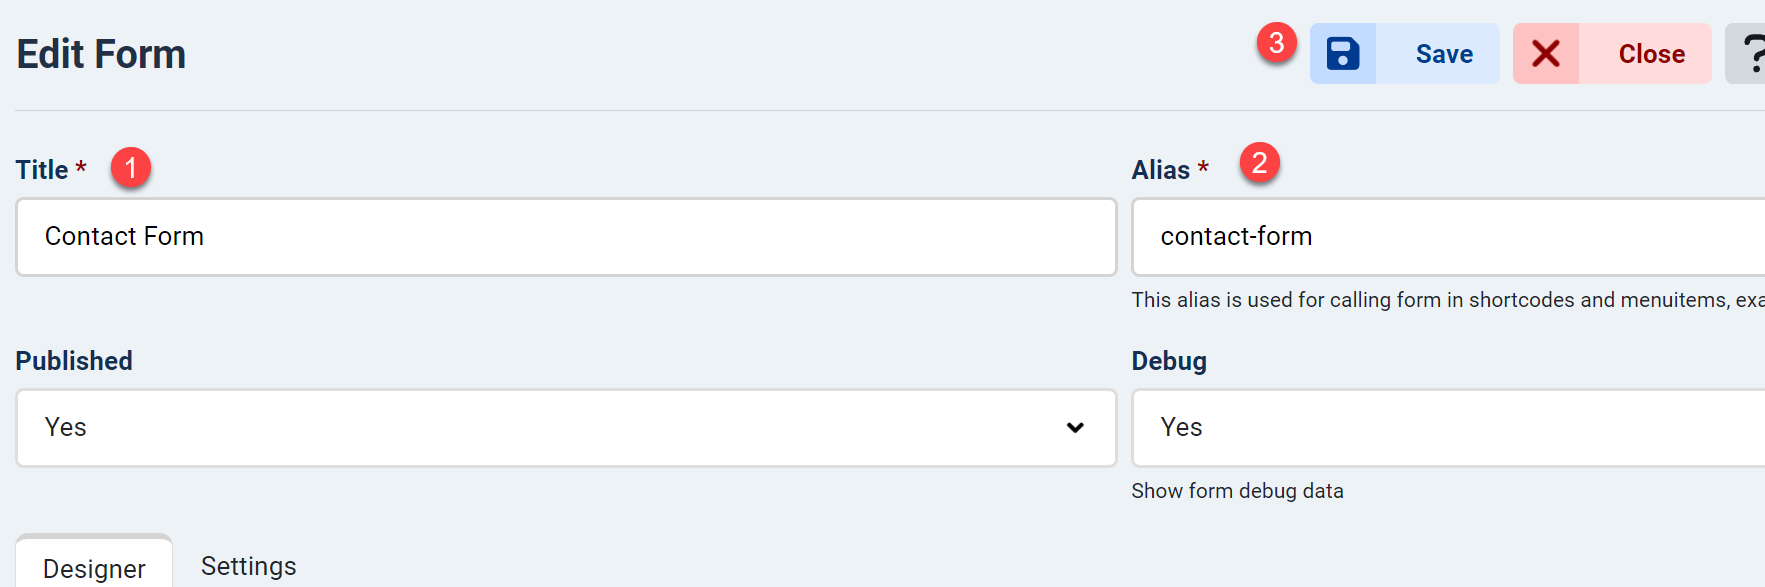
- Enter the form title (e.g., "Contact Form") for admin identification.
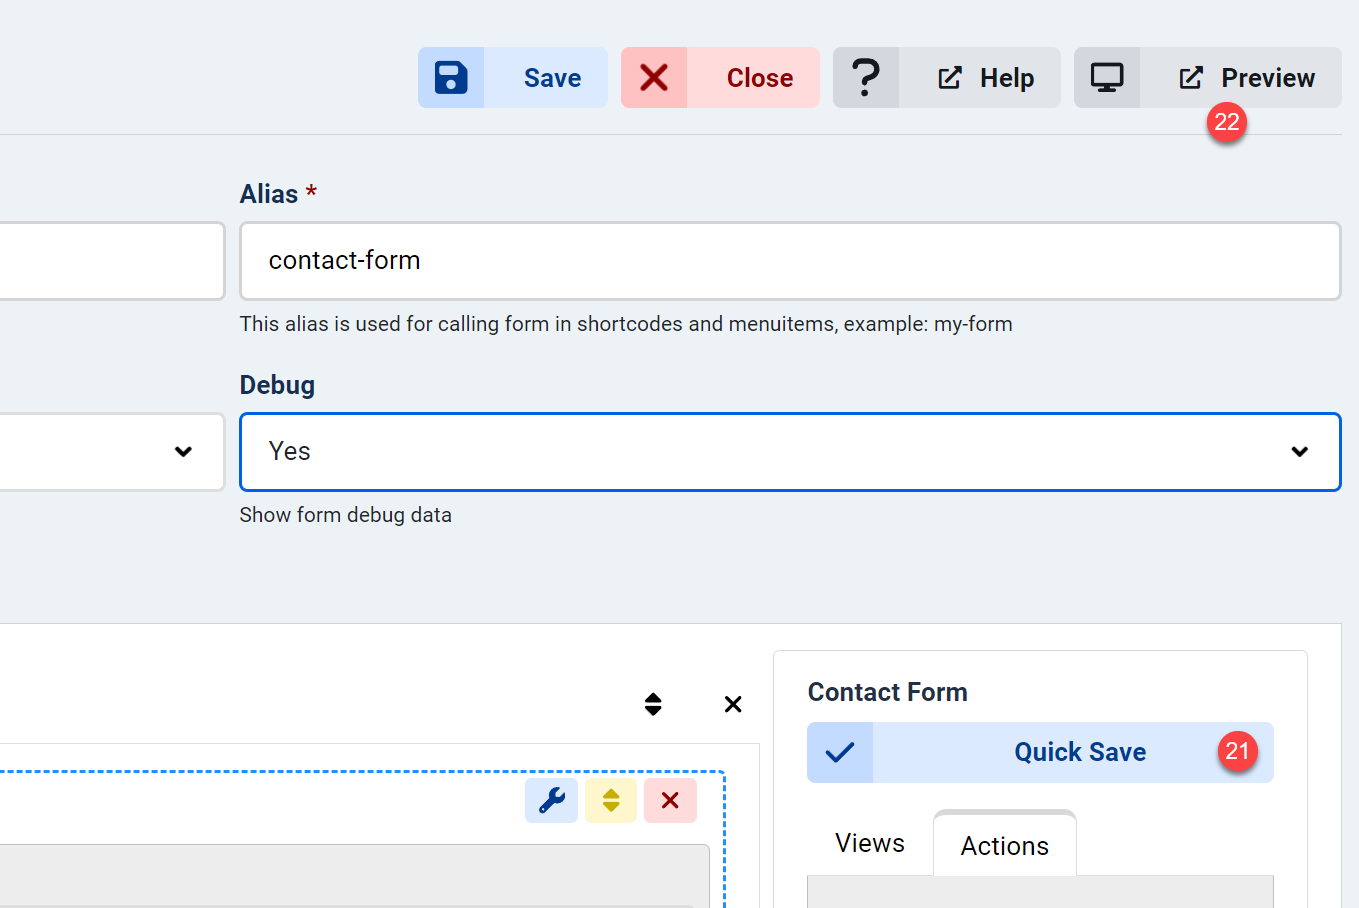
- Set a unique form alias (e.g., "contact-form").
- Click Save to enable Quick Save and Preview features.
Step 3: Add few fields to your form
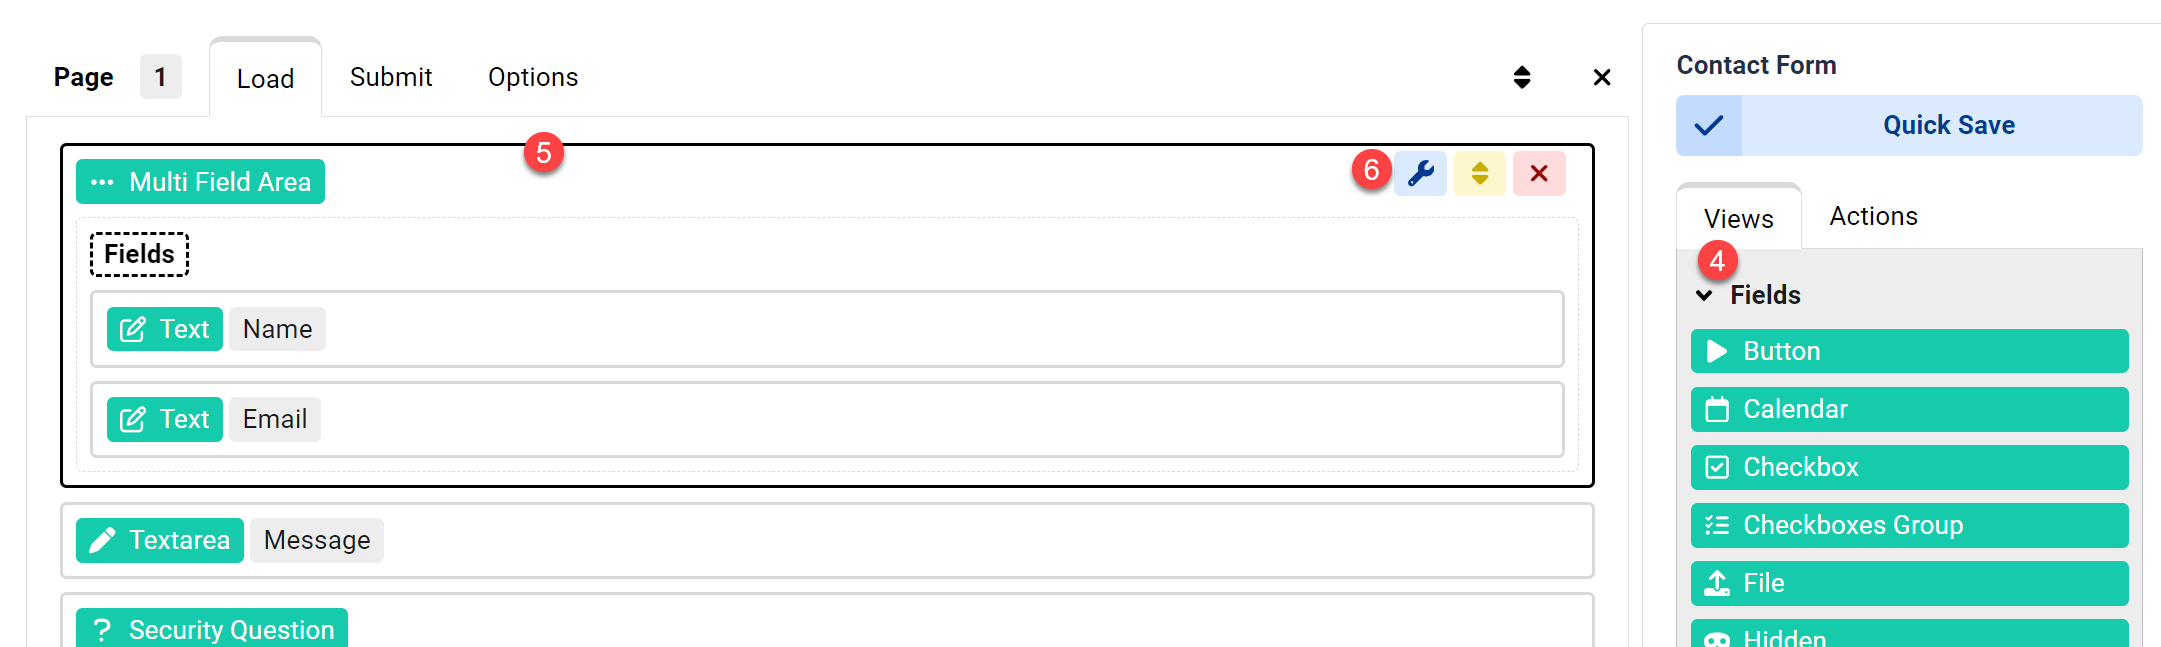
- In the "Load" event of your form’s Page, drag fields from the Views box on the right.
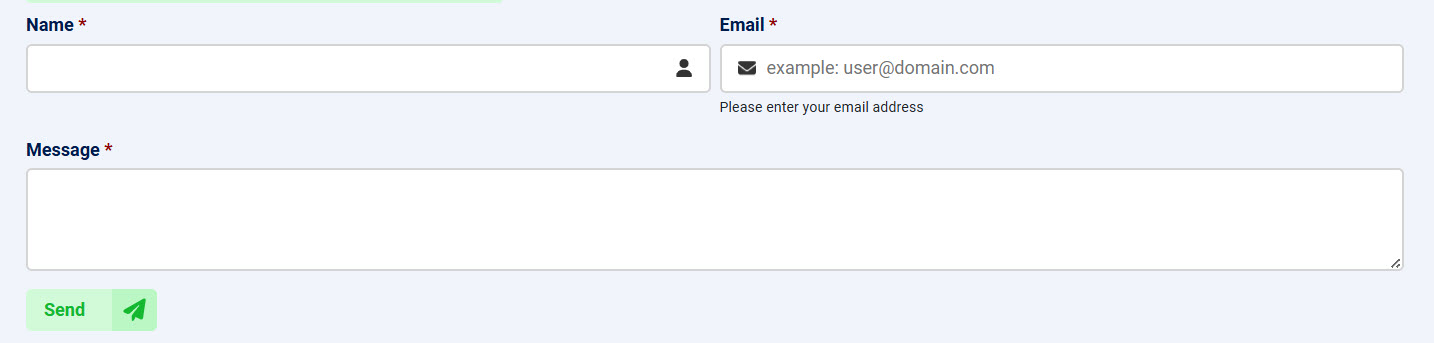
- Add four elements: two Text fields (for Name and Email), one Textarea (for Message), and one Button (for Send).
- Hover over the Email field, click the Edit icon to configure it.
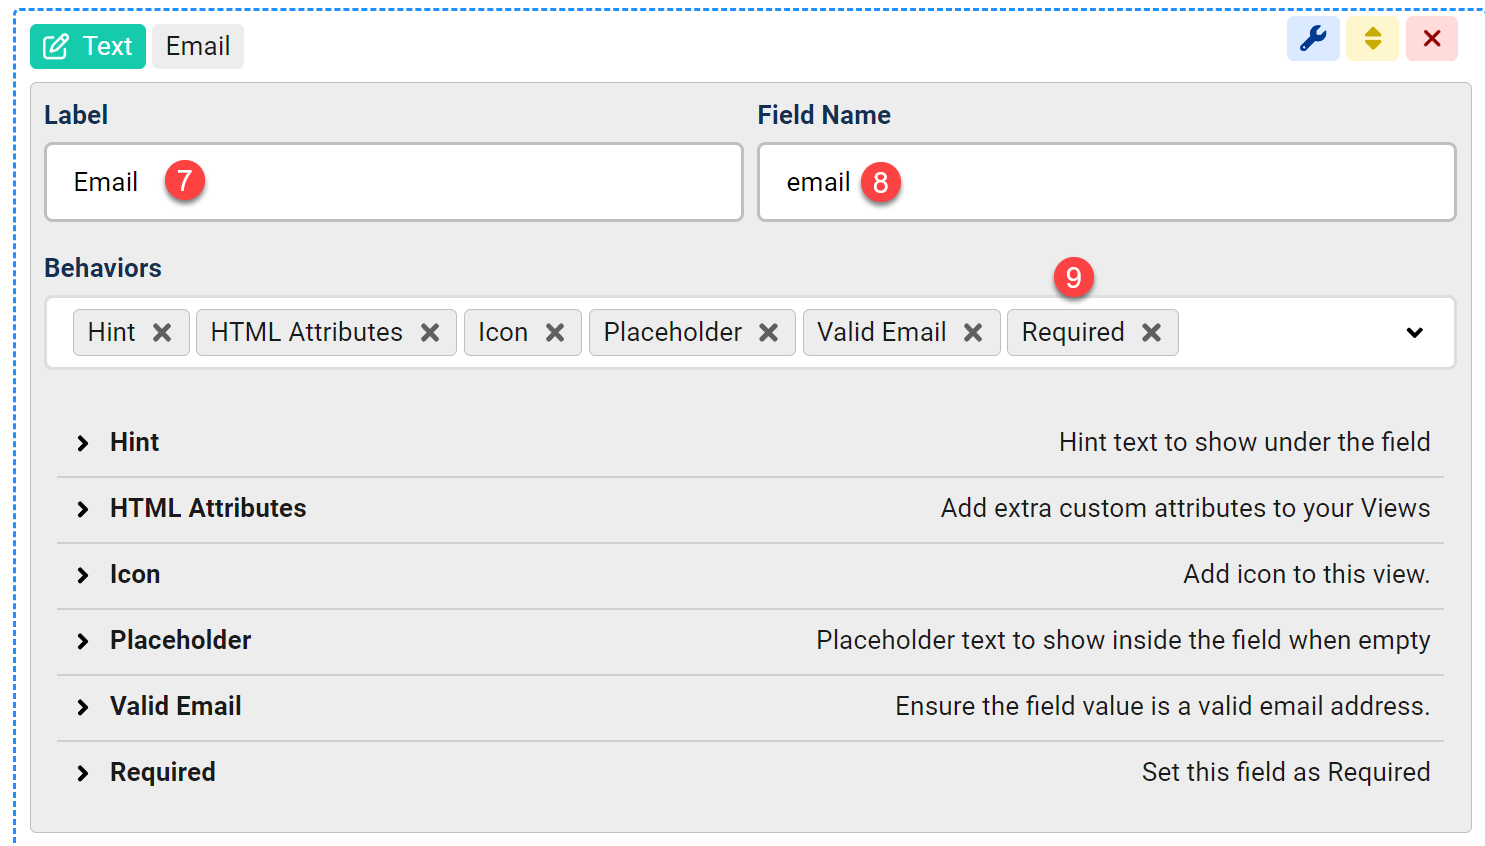
- Change the field label to "Email".
- Set the field name to a readable value, e.g., "email".
Tip: Use human-readable field names to easily retrieve data using ChronoForms shortcode syntax, like{data:email}. - Add two validation rules: ensure the field is not empty and contains a valid email address.
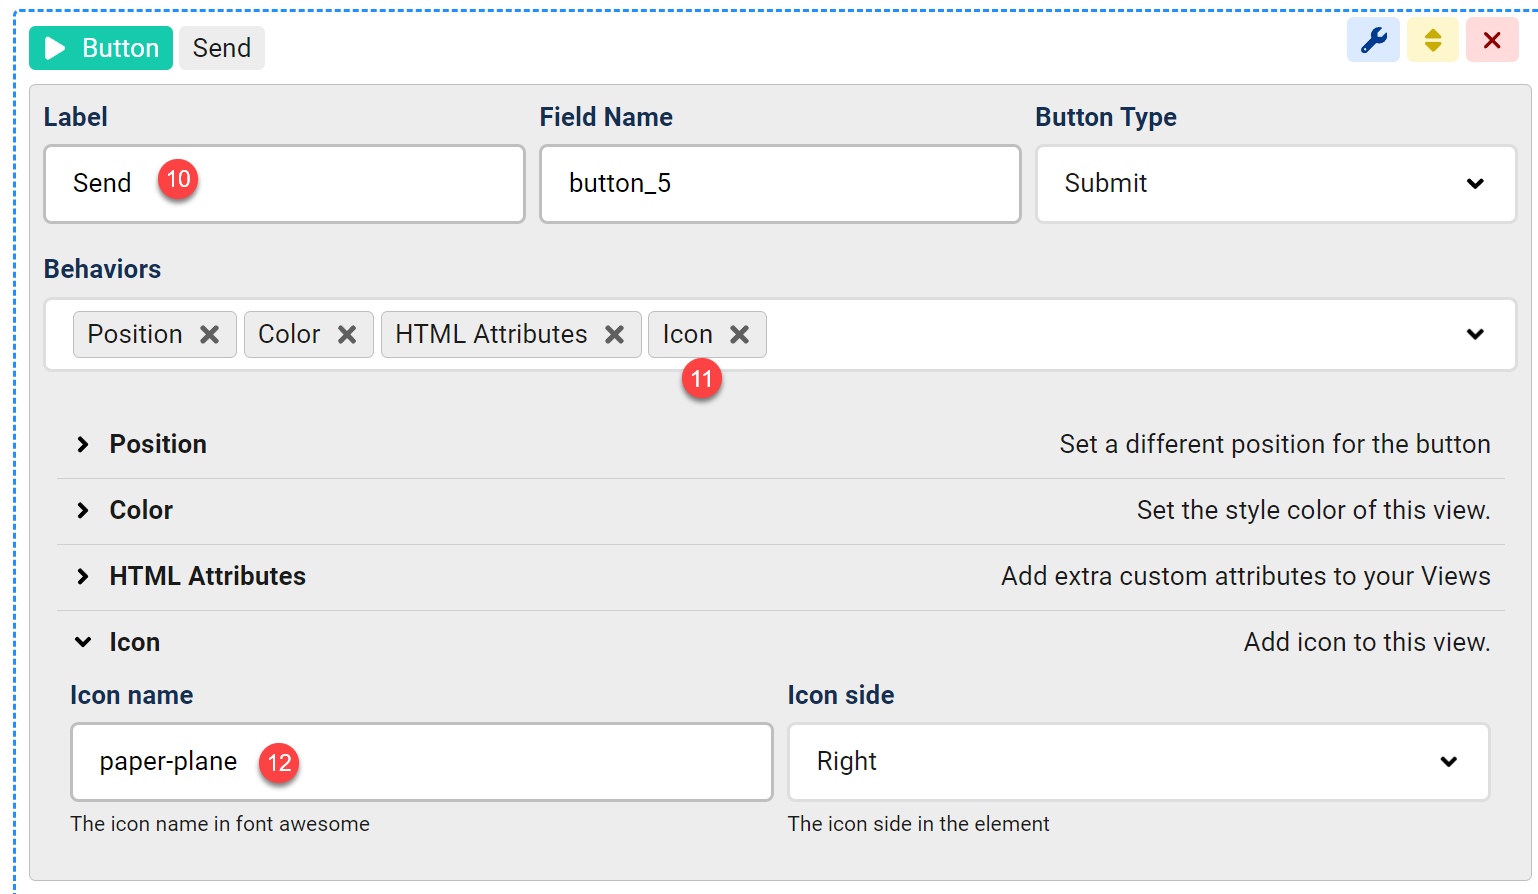
- Open the Button settings and change the label to "Send".
- Enhance the button by adding a "paper-plane" icon from the Font Awesome 6 free icons library.
- Adjust the button color for better visibility (optional).
Step 4: Setup the contact form Emails and Confirmation Message
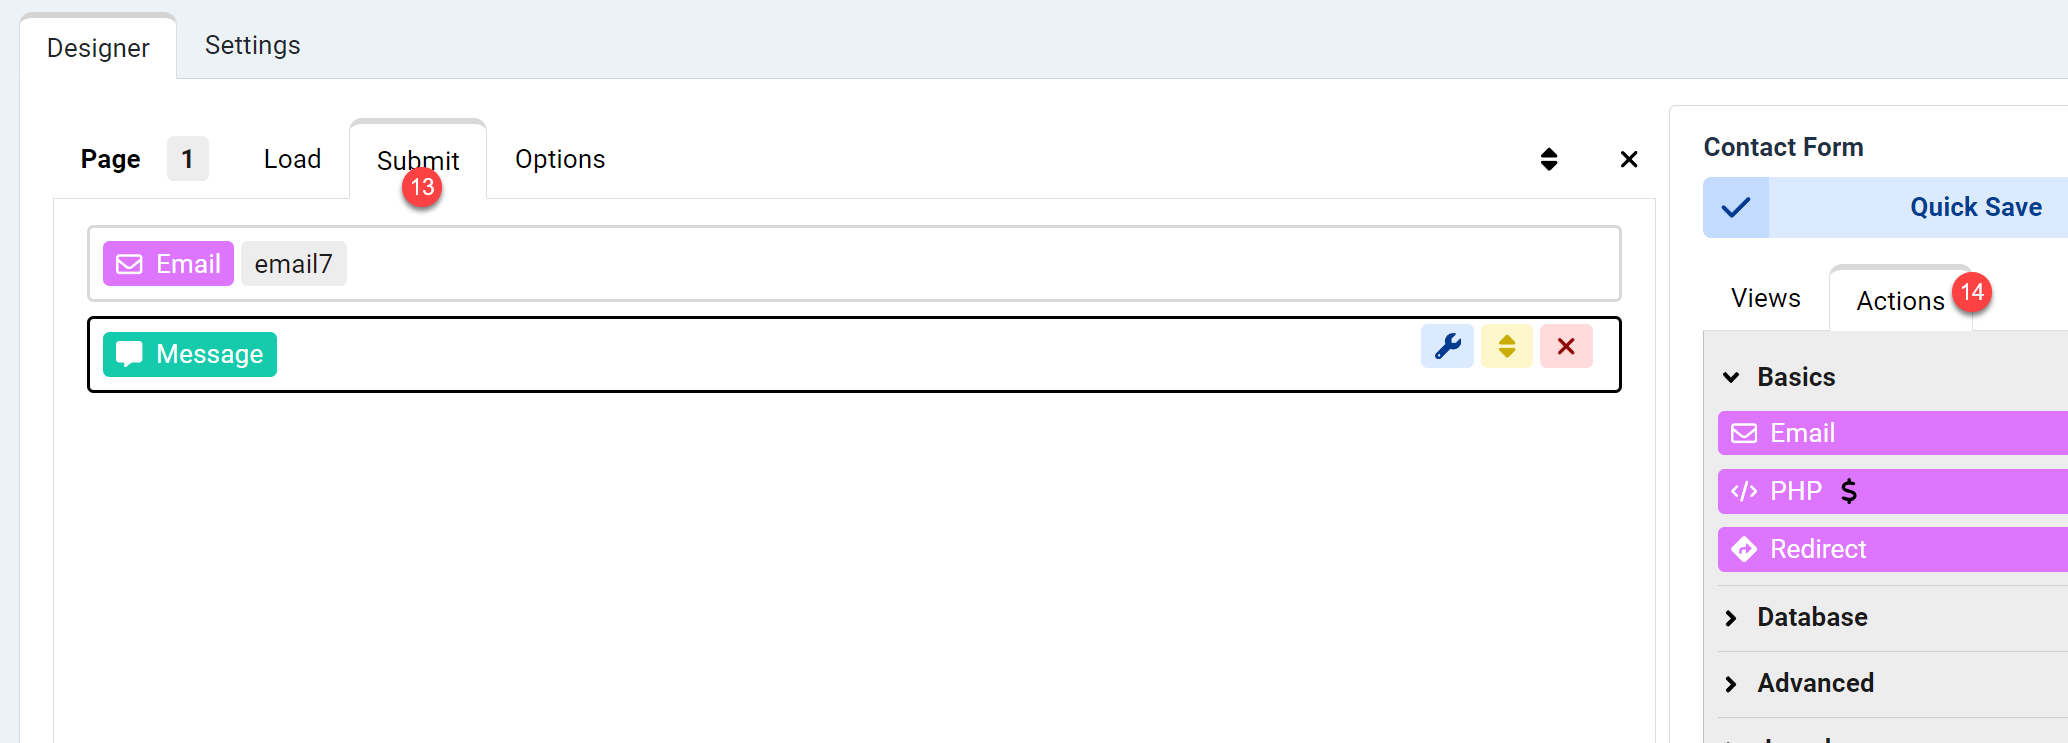
- Switch to the "Submit" event of your page to handle form submission.
- Drag an Email action from the Actions box to the "Submit" event.
Drag a Message view from the Views box to display a "Thank You" message after submission.
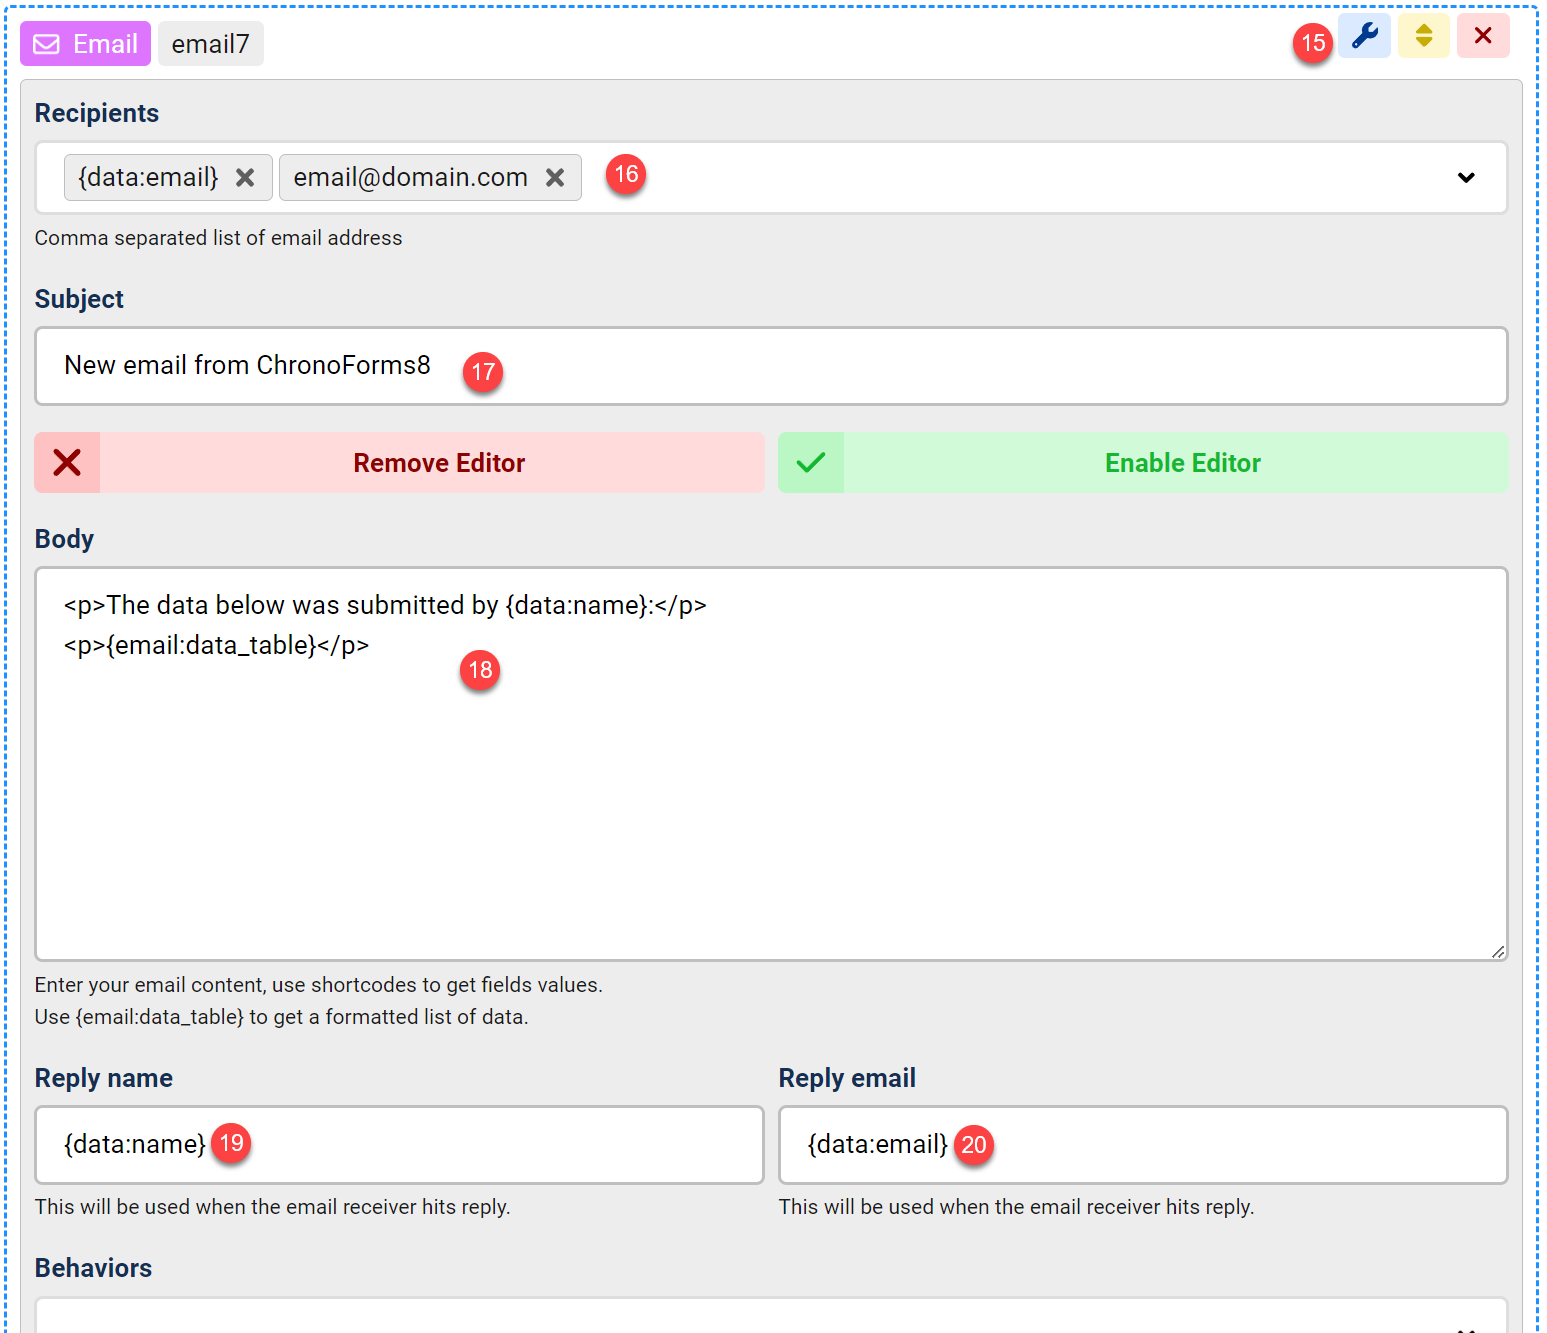
- Open the Email action settings.
- Enter the destination email address (e.g., your admin email).
- Set the email subject, using shortcode
{data:name}to include the Name field value. - In the email body, use shortcodes like
{data:field_name}for individual fields or{email:data_table}for a formatted table of all form data. - (Optional) Add
{data:name}in the Reply Name field to auto-populate the sender’s name in replies. - (Optional) Add
{data:email}in the Reply Email field to auto-populate the sender’s email in replies.
Step 5: Save and test the form
- Click Quick Save to save your form.
- Click Preview to test the form.
Tip: Use ChronoForms shortcodes like {data:field_name} to dynamically insert field values from the "Load" or "Submit" events of the same or previous pages.
Using ChronoForms8 for a WordPress Contact Form
ChronoForms8 is also compatible with WordPress, allowing you to create a contact us form with similar functionality.
- Install the ChronoForms8 WordPress plugin
- Activate the plugin and navigate to the ChronoForms8 dashboard in your WordPress admin panel.
- Follow the same steps as above to create a form, add fields (Name, Email, Message, Send button), and configure the Email action.
- Embed the form on a WordPress page using the ChronoForms8 shortcode (e.g.,
[chronoforms8 alias="contact-form"]). - Test the form to ensure it sends emails correctly.
Enhancing Forms with ChronoMails
ChronoMails, a new extension for Joomla, enhances email functionality with custom templates, email logging and newsletters.
Conclusion
ChronoForms8 makes it easy to add a contact form in Joomla or WordPress. By following this guide, you can create a custom form, configure SMTP for reliable email delivery, and explore ChronoMails for advanced features. Test your form thoroughly and check DNS settings to ensure emails reach their destination.


Comments