Overview
This guide provides a clear, six-step process to integrate Stripe payments into your ChronoForms 8 form for Joomla or WordPress. It covers installing the plugin, adding and configuring the Stripe action, generating and storing a unique order ID, and setting up the Stripe Listener to handle payment webhooks. The tutorial also includes instructions for updating your database and testing the listener to ensure a fully functional payment system.

The stripe payment action is very easy to setup, here is how to do this:
Step 1: Install ChronoForms8
Make sure your have the latest ChronoForms 8 for either Joomla or WordPress installed on your website, latest updates can be found on the official Downloads page
Step 2: Add the Stripe action to your form
We are redirecting to Stripe after the form submit, and so we have placed the Stripe action in the Submit event of the form's first page:

Step 3: Configure the Stripe action
Next we need to configure the Stripe action, This is how our Stripe action should be setup:
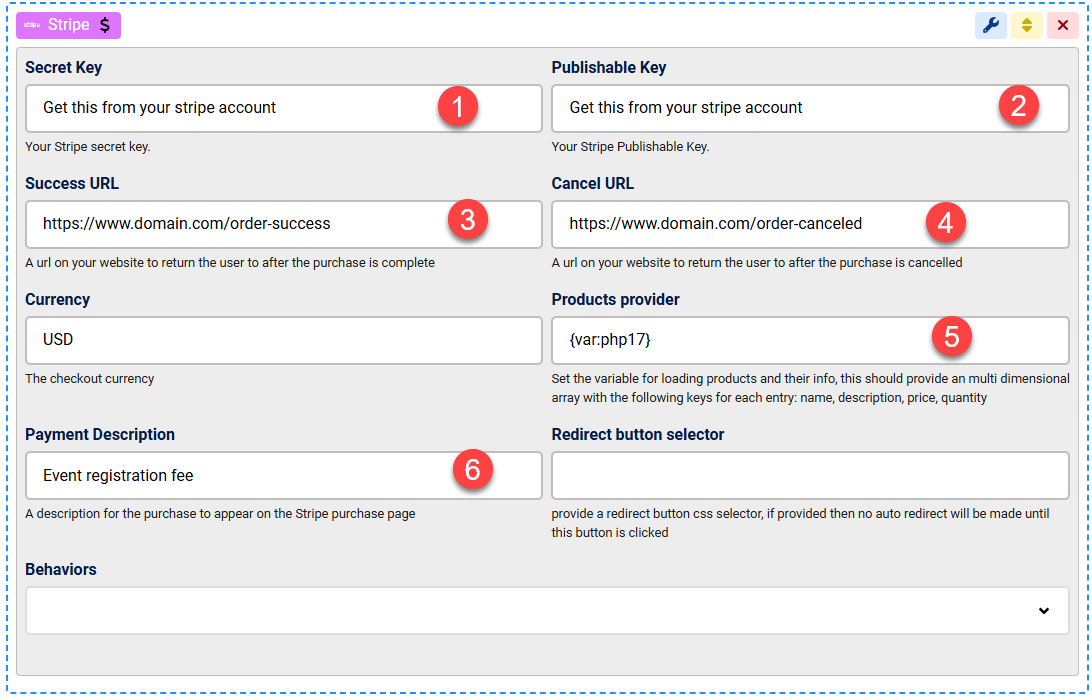
- The Secret key can be found in your Stripe account settings under the Developers > API keys section: https://dashboard.stripe.com/apikeys
- The Publishable key can be found on the same page in your Stripe account with your Secret key
- The Success URL is where your customer will be redirected after completing the purchase successfully, this can be any URL on your website
- The Cancel URL is where your customer will be redirected if they cancel the purchase, this can be any URL on your website
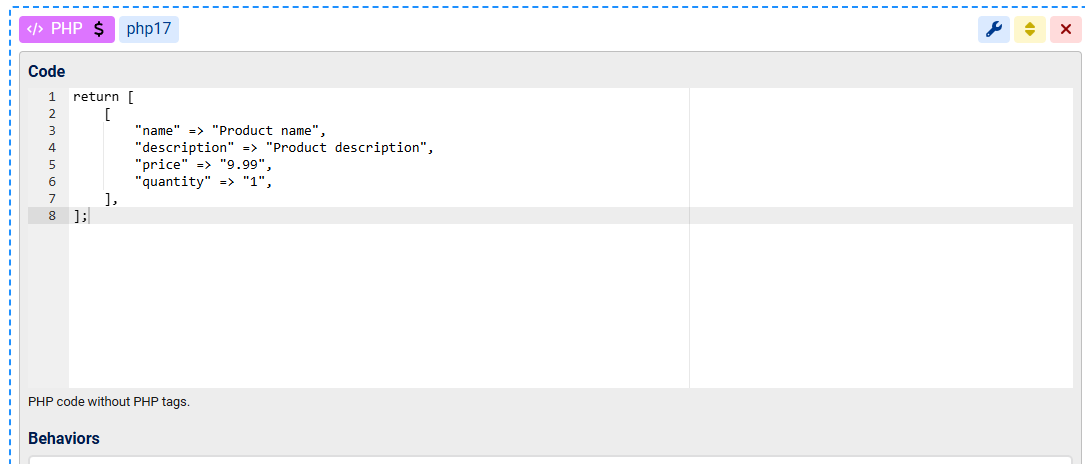
- The Products Provider is a multi dimensional array for the products to be listed on the purchase page on Stripe, the array should contain sub arrays with at least the name, description, price and quantity keys, here is an example of how we setup the php17 action to return the array we need, we then use {var:php17} variable to feed this array to the stripe products provider:
- The Payment description is a string to describe the whole payment and will be displayed on the Stripe payment's page.
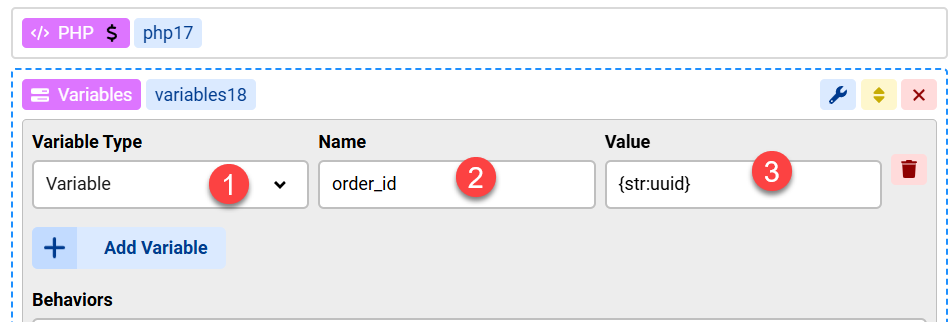
Step 4: Generate, Store and send to Stripe a unique Order ID
You may want to generate an Order id and store it to the Database BEFORE redirecting to Stripe, you can do this using the Variables action with the {str:uuid} shortcode:
Then we can save it using the Save Data action as show below, please note that the "order_id" should be replaced by the name of the table column holding the order_id

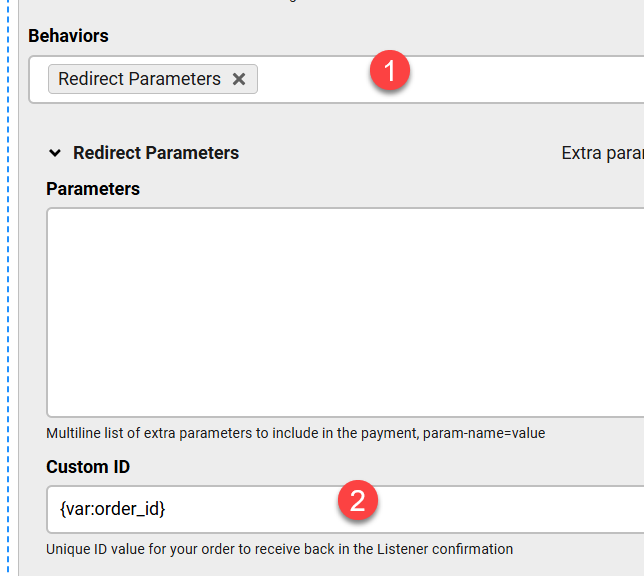
We can then pass this value to Stripe using the Custom ID variable under the Redirect Parameters behavior:
Step 5: Setup the Stripe Listener action to receive payment webhook notification from Stripe
On the same form, add a new page, change the Page Group to "webhook" and note the page name:
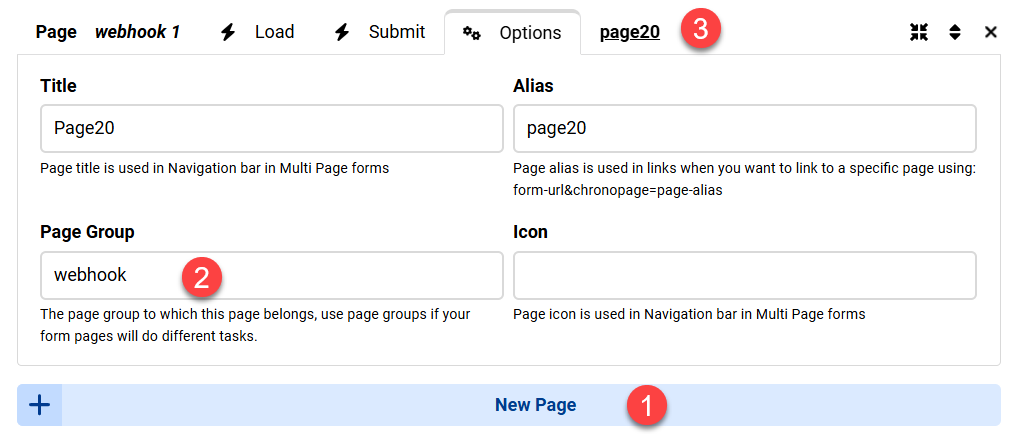
In your Stripe webhooks page, use the link: https://www.domain.com/LIVE-LINK-TO-YOUR-FORM?chronopage=page20&output=ajax
Change the "page20" to your page Alias
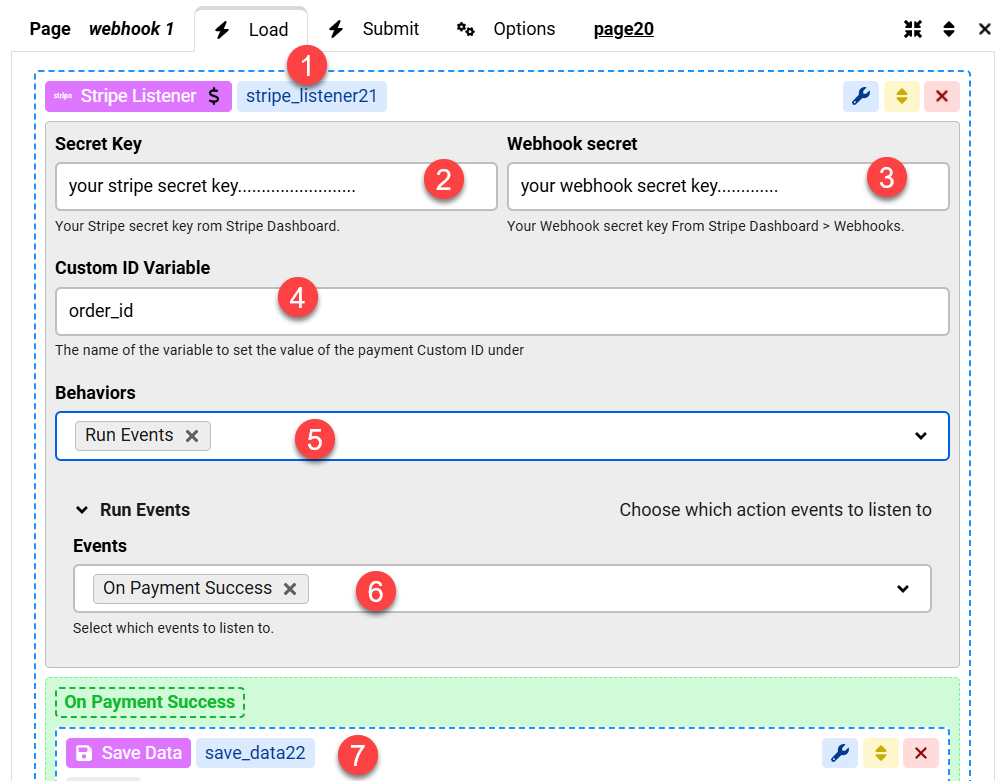
Under the Load event of the webhook page, add the Stripe Listener action and configure the secret words and choose a name for the Custom ID we sent to Stripe earlier.
You will then need to enable the Run Events behavior, and enable the "On Payment Success" event, and drag a "Save Data" action under it as shown at #7
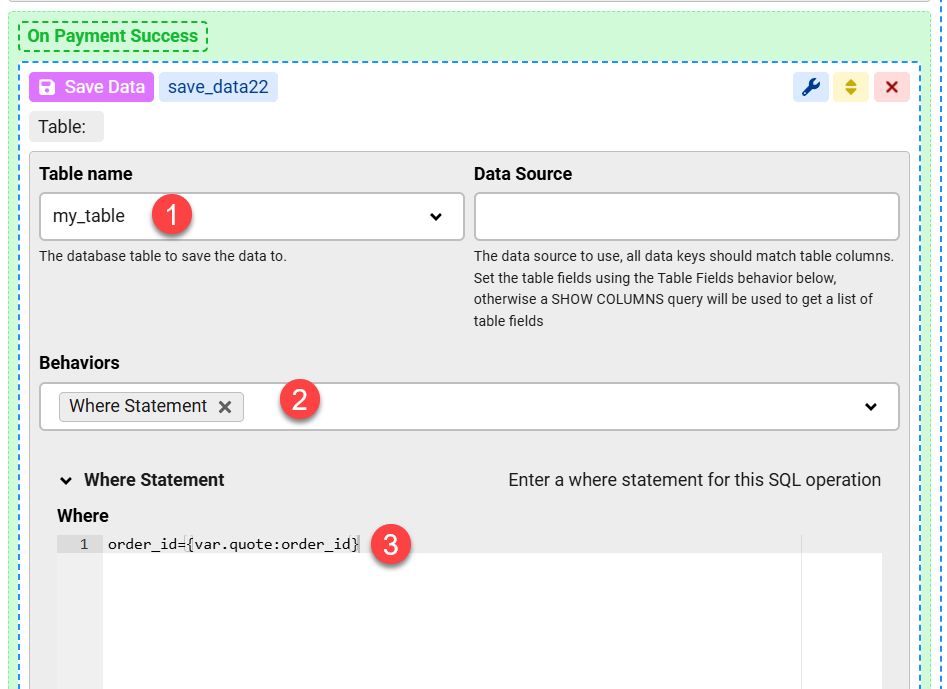
Step 6: Update your orders database table
You may then update your database table using the order id we received from Stripe:
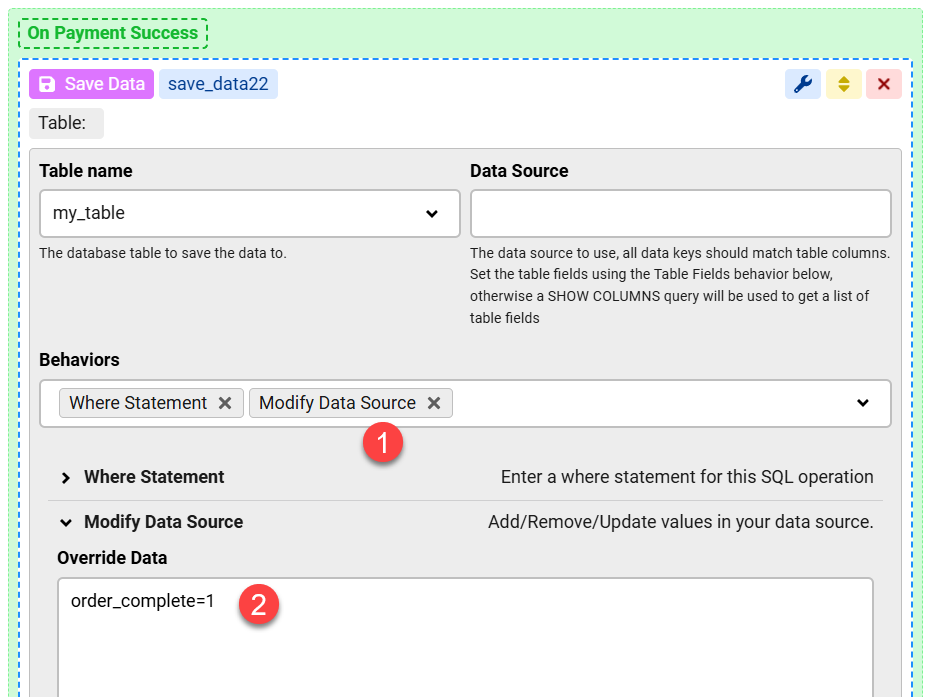
Use the Modify Data Source behavior to update the table field marking the order as finished, we use an "order_complete" field here:
Test Stripe Listener activity
In some cases you may need to make sure the Stripe Listener is accessible by the Stripe gateway, you can do this by:
- Adding a Message view with some content ABOVE the listener and pasting the Listener link in your browser's address bar:
https://www.domain.com/LIVE-LINK-TO-YOUR-FORM?chronopage=page20&output=ajax
if you can view the message then it means the Listener is accessible by Stripe - In order to test Stripe calls to the listener, you can replace the message by a dummy email action, make sure the Recipients, Subject and Body fields only are filled, then run the same test above OR do a test transaction, you should receive the email if everything is setup correctly.


Comments