Overview
This tutorial demonstrates how to link two calendar fields, named "arrival" and "departure," to create a date range selector. You'll configure the Arrival field with Date/Time Limits and set the End Date Field, then apply similar settings to the Departure field with the Start Date Field. The result is two interconnected calendars where the departure date cannot be selected before the chosen arrival date.

We start our form with 2 Calendar fields as shown
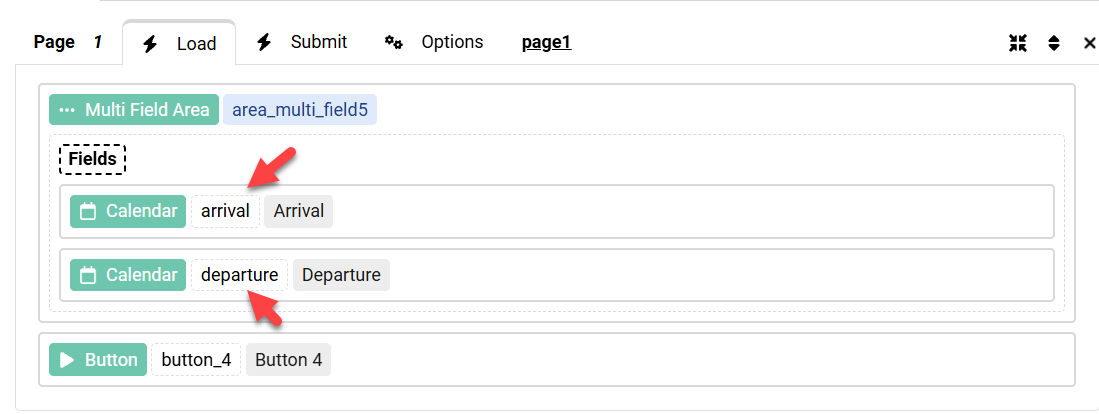
Please note that our fields names are arrival and departure as shown
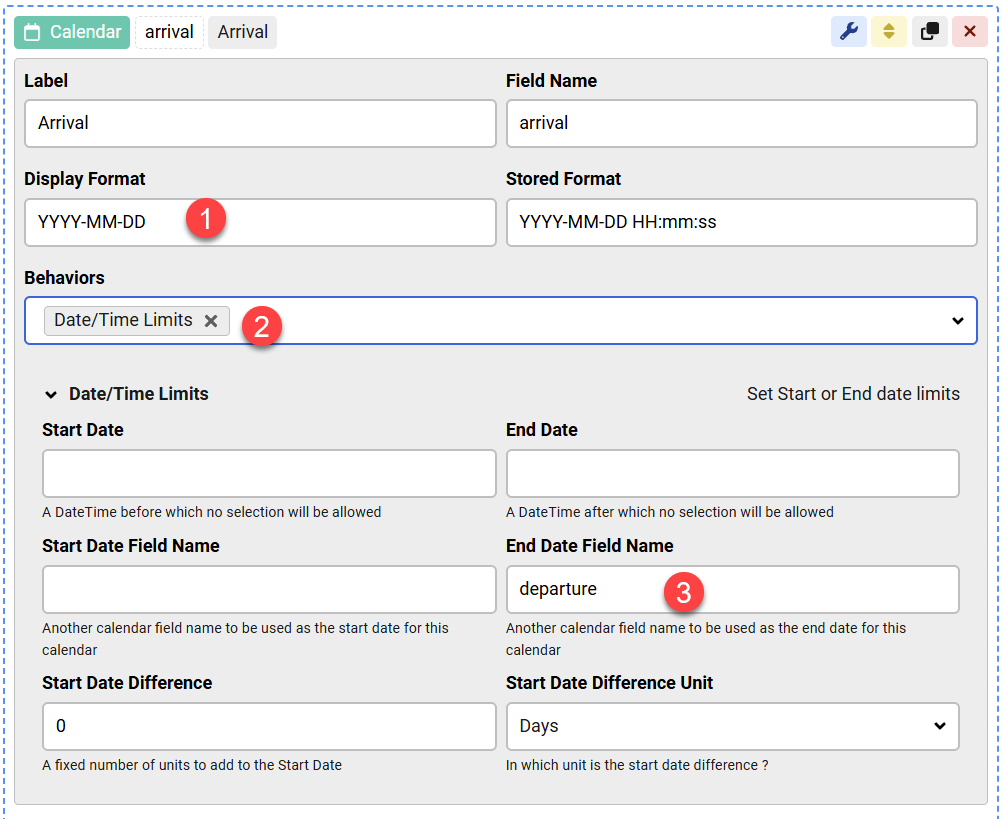
In the Arrival field settings, we change the format to use the Date only, we enable the Date/Time Limits behavior and we set the End Date Field name:
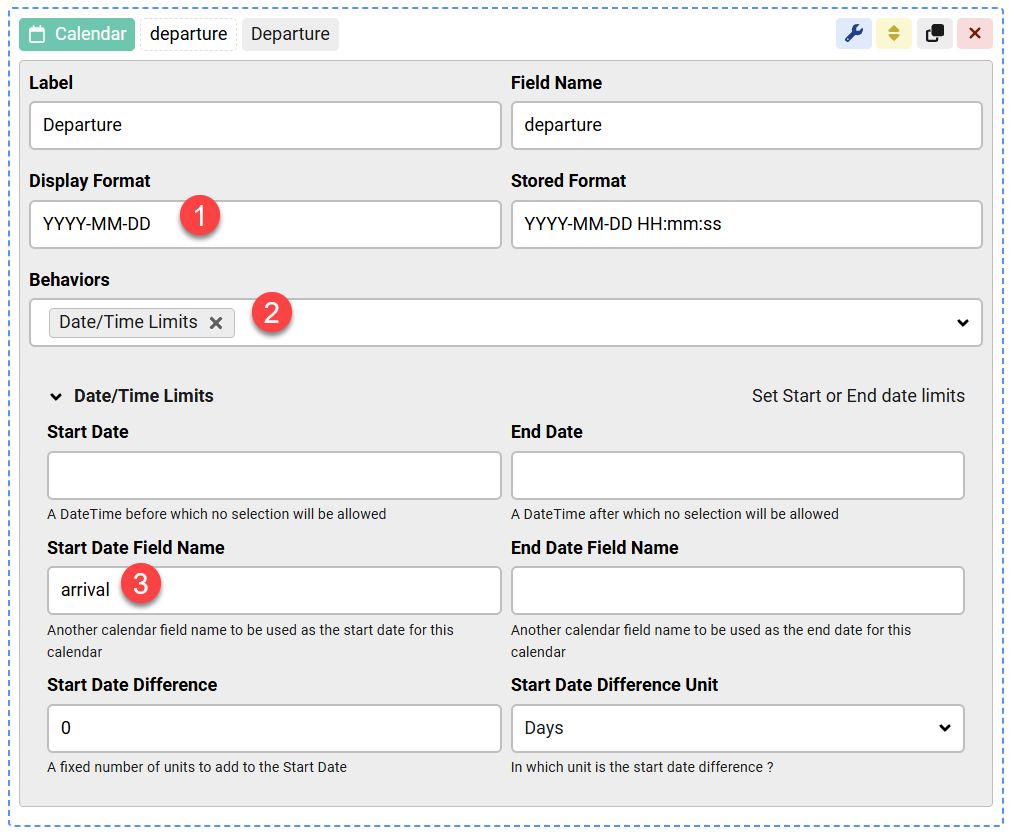
In the Departure field we do the same, but here we set the Start Date Field Name:
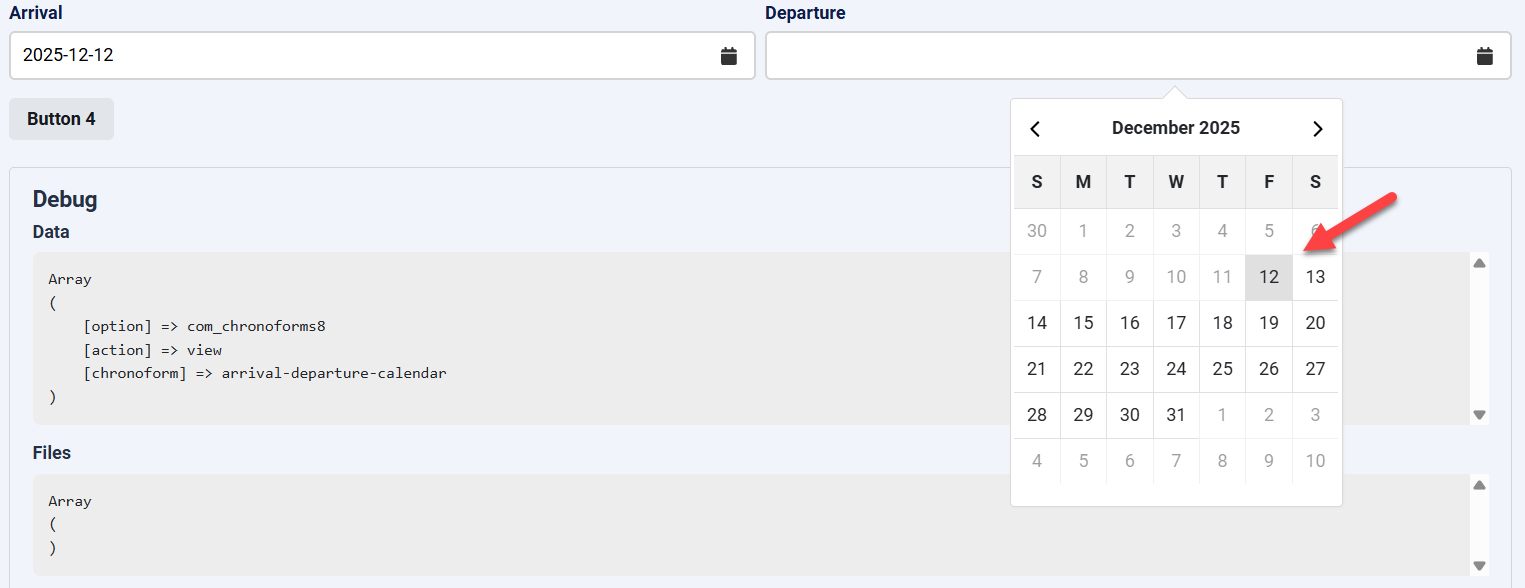
The end result is 2 calendar fields which are connected in date range, we can not select Departure dates before 12 because 12 is the Arrival date.


Comments