Overview
This tutorial explains how to display database records in a paginated table using Chronoforms8. It details configuring a Read Data action to fetch records and a Table view to show them, then adding an edit page with form fields and a Save Data action to update records. The process includes creating links from the table to edit pages and redirecting back to the listing after saving changes.
In this tutorial we will list records in a database table and show the list in a table using Chronoforms8
In order to list the data and have a paginator, we need to supply the Table view with the records list along with the records count in our table, so in total we need 3 items in our page:

- Read Data action for reading the table records and counting them
- Table view is for displaying the records in a list.
Let's look at how the Read Data is configured:

- First we need to choose the database table to read the records from.
- Then we need to set the Read Type to "all matching records with count" to get a records list and also the total count.
- Then we need to make sure our records list is pageable, sortable and has a limit, say 10 records per page.
- The sortable setting is optional, but I have configured it to sort by the title column in the selected table:
Then our Table view needs to be configured to get the records list and the records count from both Read Data actions and display a list of records showing at least 1 column:
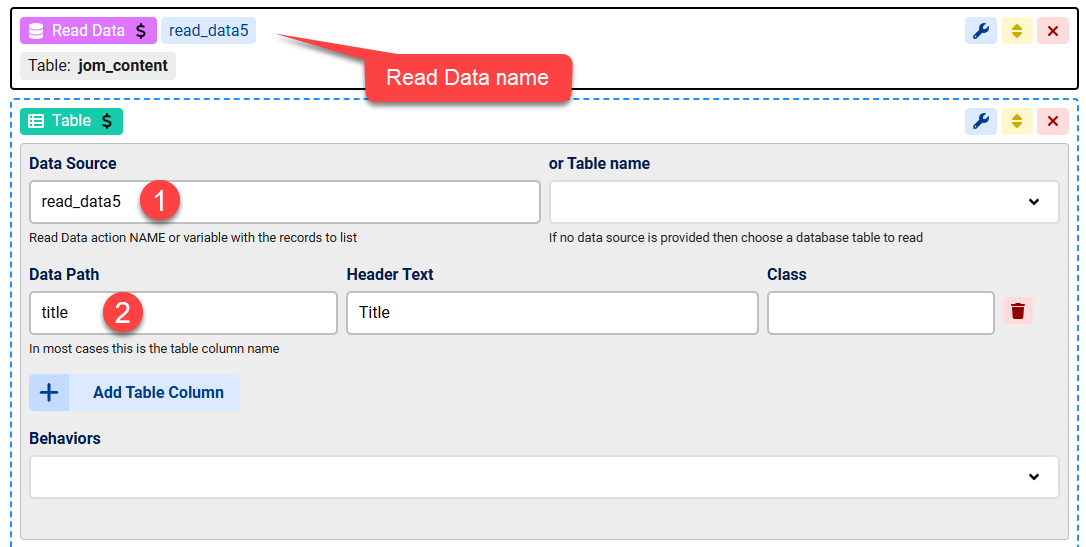
- In the Data Source we will enter the name of the Read Data action which is "read_data5", this will instruct the table to read the records list & the count of records and other settings from the Read Data action.
- We need to add at least one table column, we choose the title column here, this column always has a value in the database table we choose
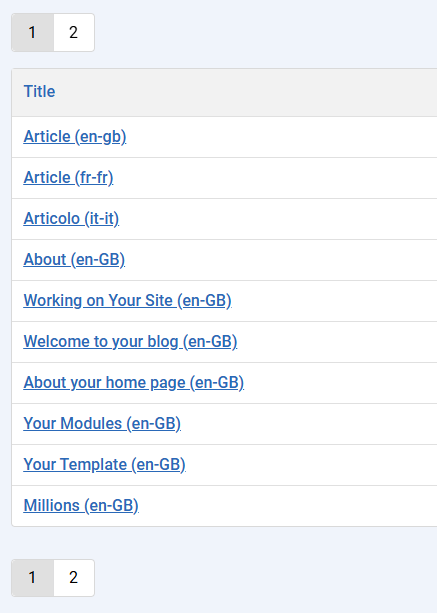
Save the form and now you should have a list of all records in your table, if the records are more than 10 then you will also have a paginator to navigate the records list.
Creating a Link to an Edit page in your Table
1- After saving the form, the table view will have a new area named "title", we will add a Text Node view there to link to a different page for editing the record:

2- For each row there is a variable named "row" which has an array of all columns names & values, so to get the value if the "title" column we can use {var:row.title}
3- We need the Text node to link to a different page and so we will enable the "Link URL" behavior and set the Base Link URL to {url:} in order to get the current page's url
4- in the URL Parameters we need to set the link's page name using "chronopage=edit" and the row's id using "id={var:row.id}", now the link should look like this: current-page-url&chronopage=edit&id=row-id
Our title column should now display a linked title value:
We can now add a new page to our form using the "New Page" button at the bottom of the designer:

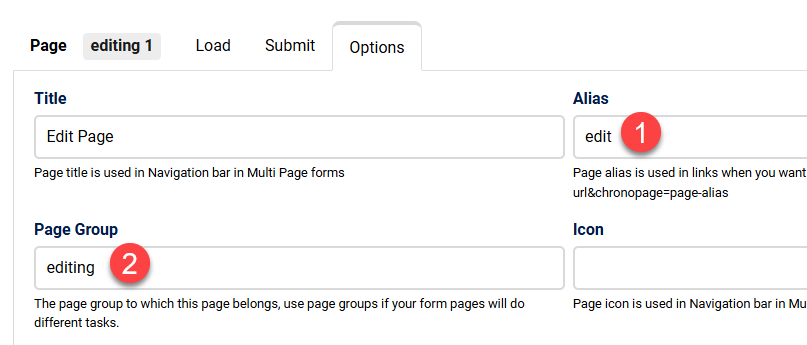
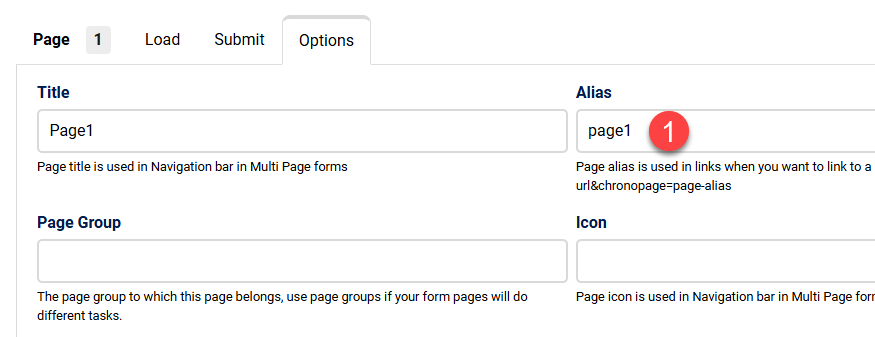
In our new page Options area:
1- we need to set the page alias to "edit" to match the link we have created
2- we also need to give our new page a different Page Group name in order to be accessible using direct links:
Then in our new edit page "Load" area we will need a Read Data action to read the record of the passed id value:
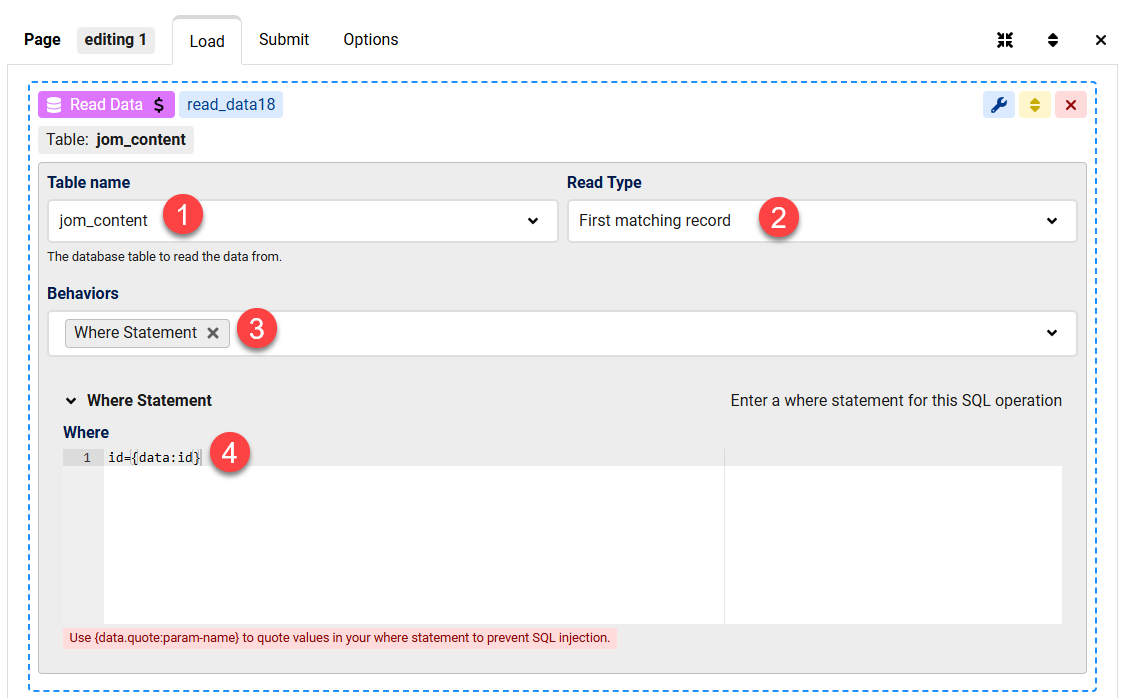
1- We choose the same table as before
2- We set the Read Data to read a single record
3- We enable the "Where statement" behavior
4- We set the Where statement to get the row with the "id" column matching the value of the data parameter named "id"
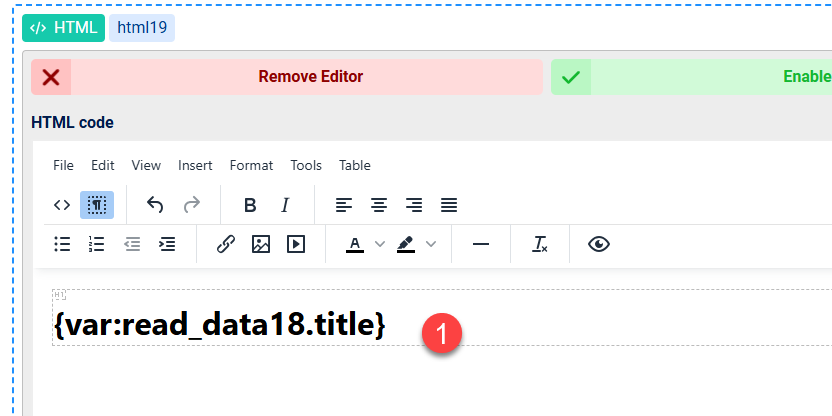
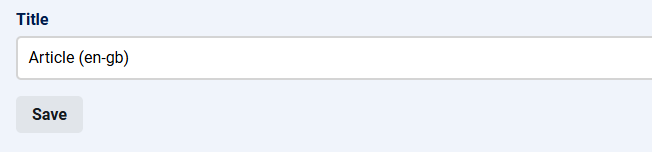
Our new Read Data action is called "read_data18", if we need to test the loaded values we can add an HTML view and try to display the value of the "title" column:
That should work as expected, but in our case we need an Edit page, so we need to have few form fields to edit the record, we will add a single text field for the record's title as an example:

1- We must enable the "Data Merge" behavior in order to load the fields with the record's data
2- we add our field, 3- name it "title" to match the table column's name
4- We add a button to submit the "edit" page
Clicking the link in our table should now display the edit form:
Saving changes to the record
In order to save changes made in the edit page, we need to add a Save Data action to the edit page "submit" area:
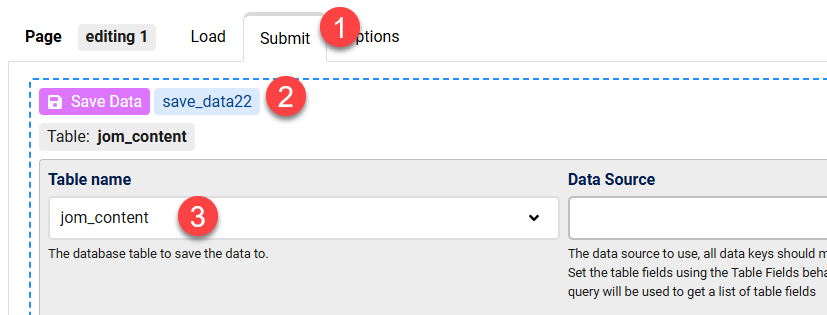
1- Switch to the "submit" are of the edit page
2- Add a Save Data action
3- Set the table name to the same table used in your application
We then need to configure the Save Data to update the open record using a Where statement:
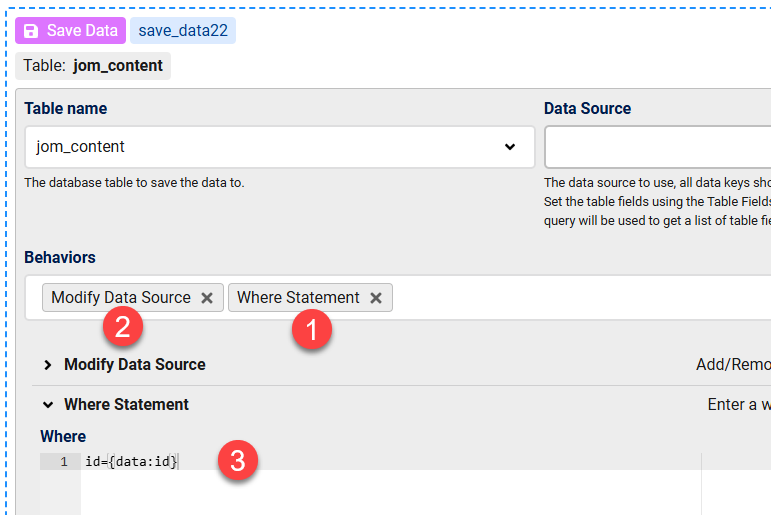
1- Enable the Where Statement behavior
2- Enable the "Modify Data Source" behavior
3- set the Where value to id={data:id} which means we are going to update records where the id column matches the value of the id parameter in the url
4- In Modify Data Source set the Data as following:
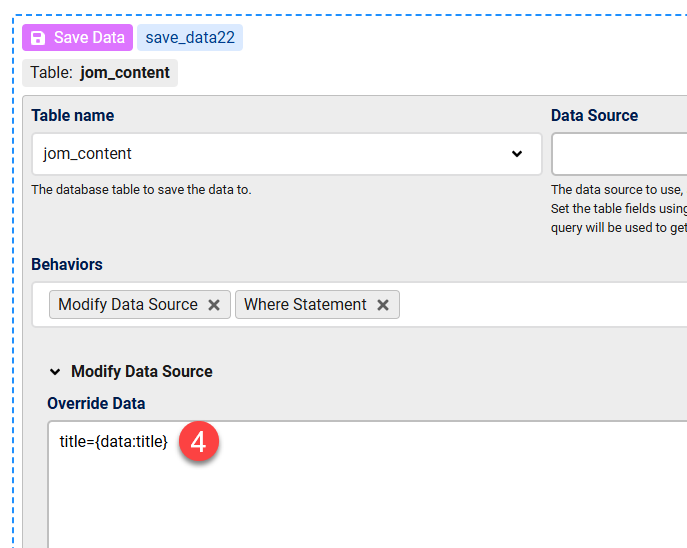
We are setting our data source to be an array of the title column equals the value of the "title" field in our edit form
Finally we need to redirect back to the listing page after the save:
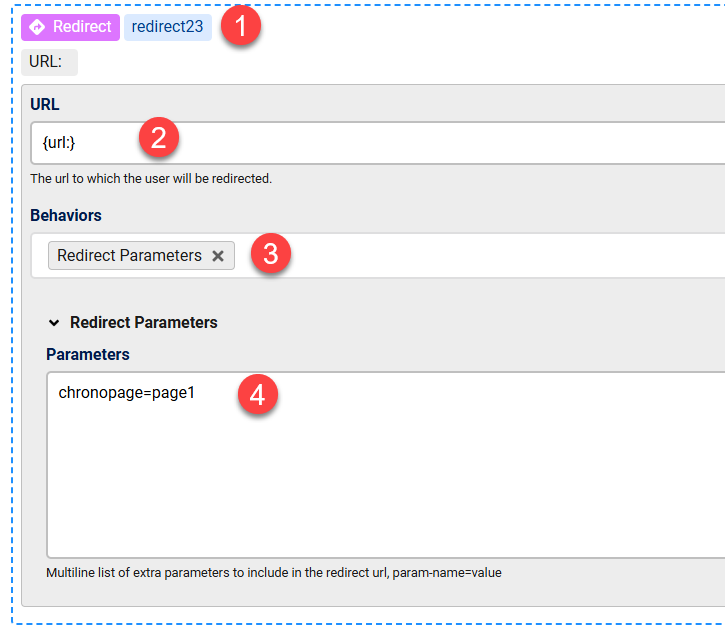
1- Add a Redirect action below the Save Data action
2- set the base URL to {url:} to get the current url
3- Enable the "Redirect Parameters" behavior and
4- Set the chronopage parameter to "page1" which is the default alias of the first form page where we have our table
Save the form and your form should now save the title updates and redirect back to the list


Comments