It you've used ChronoForms for a little while you may have noticed that in the Advanced elements group there is a ‘Container’ element that seems a little bit different. It a very useful element when you build large or complex forms and this FAQ is an introduction to using it.
The key feature of the Container element is that - as the name says - it can ‘contain’ other elements (including other containers). So you can think of it as a way of grouping form element together for one reason or another.
When you configure a Container element there is a Container Type drop-down with these entries in it: Virtual (none); Div; Field Set; Tabs Area & Tab; Sliders Area & Slider; and Custom. We'll look at each of these in turn.
If you just want a quick description of Containers, please see this FAQ, if you want more detail read on here.
A Virtual Container
A Virtual Container adds nothing at all to your Form HTML so it has no effect on how your form is displayed; what it does do is to allow you to build groups of form elements in the Preview box. If you close the Container Element and look at it in the Preview box you will see that there is a ‘Collapse’ link at the top of it. When you click this, the container collapses hiding any elements in it and showing an ‘Expand’ link to open it up again.
If you have a long form then grouping elements in Virtual containers lets you access the element groups one at a time without having to go scrolling through tens of elements down the page to find the one that you need.
Add Area Labels to each container so that you can see which group of form elements are in it.

Note: all the other Container types still work just like this and will let you group elements in the Preview box . . . and do somehing in the Form HTML as well.
A Div Container
<div class="cf_container ccms_form_element my_container" id="cf_container_1">
  <!-- element HTML is here -->
</div>
A Fieldset Container
<fieldset class="cf_container ccms_form_element my_container" id="cf_container_1">
  <legend>Area Label</legend>
  <!-- element HTML is here -->
</fieldset>
Tabs Area and Tab Containers
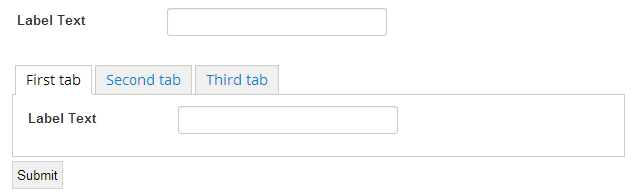
Note: not all templates provide the CSS necessary to support tab sets so you may need to add your own styling.
Sliders Area and Slider Container
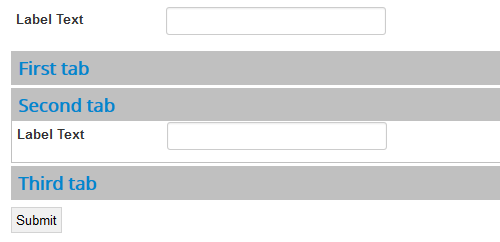
This example has some added CSS to show up the slider bars more clearly.
Note: in the CFv4 stable release (the current release as I write this) there is a bug and sliders show as tabs. The fix is to open the file /administrator/components/com_chronoforms/helpers/html_helper.php and look for lines 634-644 where there are three references to JHtmlTabs:: which need to be replaced by JHtmlSliders::
Custom Container
Note: you can add code in these boxes with other container types but it will be ignored unless the Container Type is set to Custom.
Hiding the block conditionally
<?php
$display = 'none';
if ( $form->data['some_variable'] == 'some value' ) {
  $display = 'block';
}
echo "<fieldset style='display:{$display};' >
  <legend>Some Title</legend> ";
?>
</fieldset>
<?php
if ( $form->data['some_variable'] == 'some value' ) {
?>
<?php
}
?>


Comments