Overview
This tutorial walks you through creating a contact form using Chronoforms6, covering installation for both Joomla and WordPress, designing the form with drag-and-drop fields, and configuring email notifications and confirmation messages. It includes detailed steps for customizing field settings, adding buttons, and testing the form with preview and debugger options. The guide also explains how to integrate existing HTML form code and use shortcodes for custom email templates.
In this tutorial, you will learn how to create your first contact form using Chronoforms6 for either Joomla or WordPress.
If you have not installed Chronoforms6 already, please download and install it.
Joomla
Download and install both the Chronoforms6 component and the plugin.
WordPress
Download and install the Chronoforms6 plugin.
In the Chronoforms6 forms manager, Click New > Easy form
Now enter your form title, let's call our form "Contact Form"

Click the Designer tab to open it, this is where your form interface can be customized, choose which form fields you want to have, drag any of the form fields on the left side to the section panel on the right side, you can have as many fields as you want.
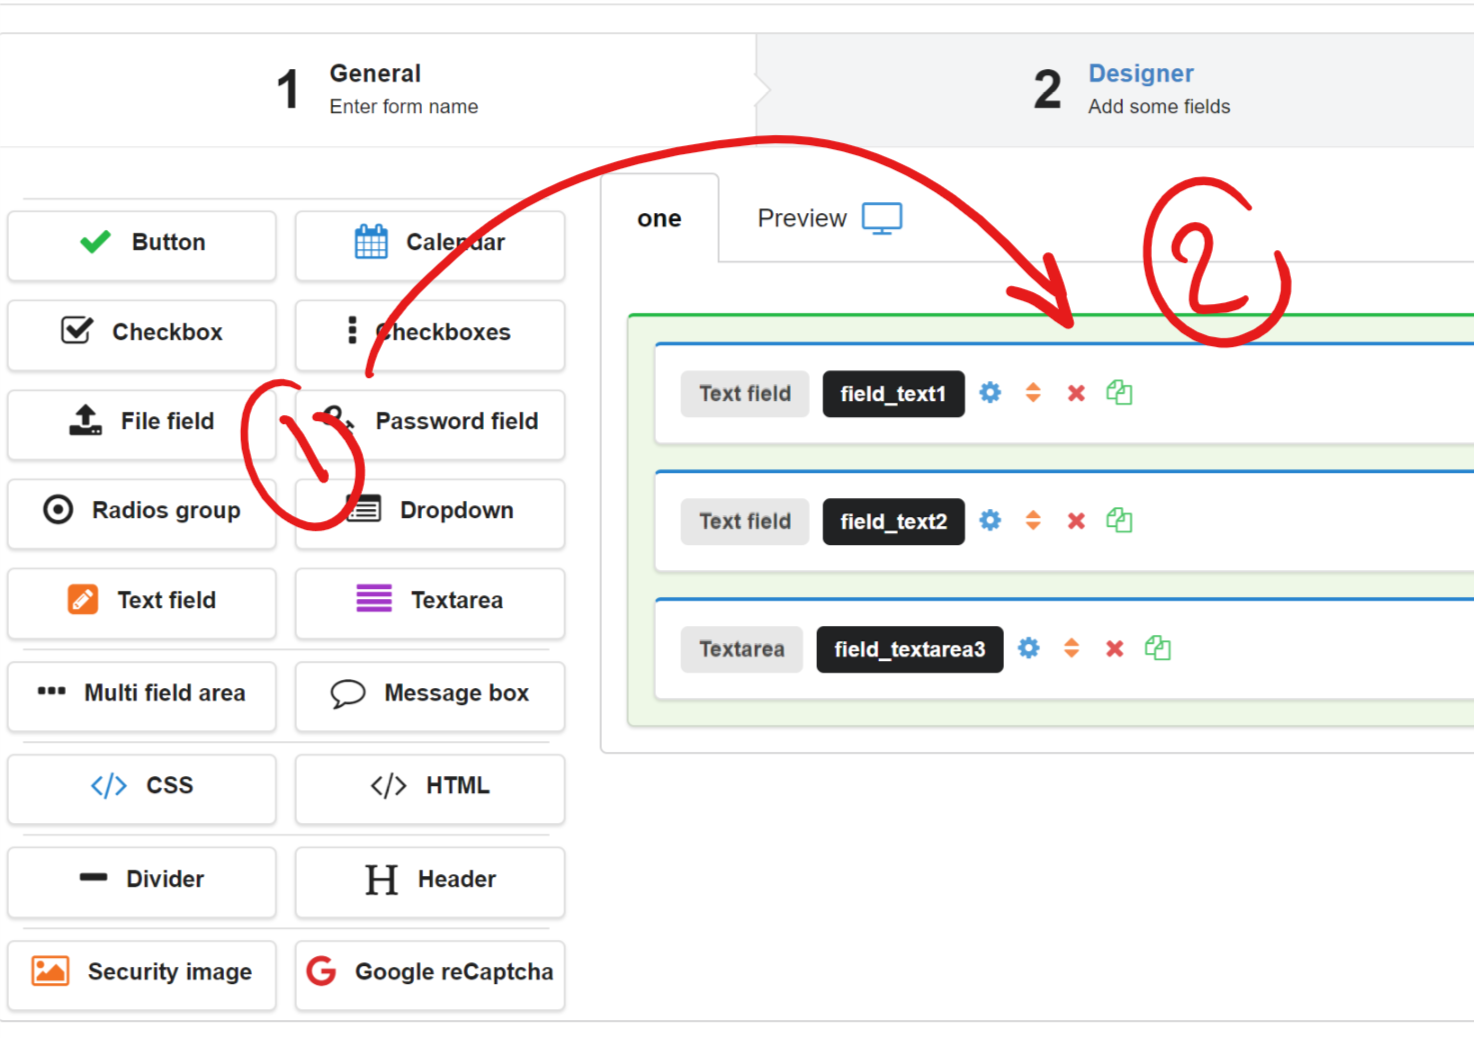
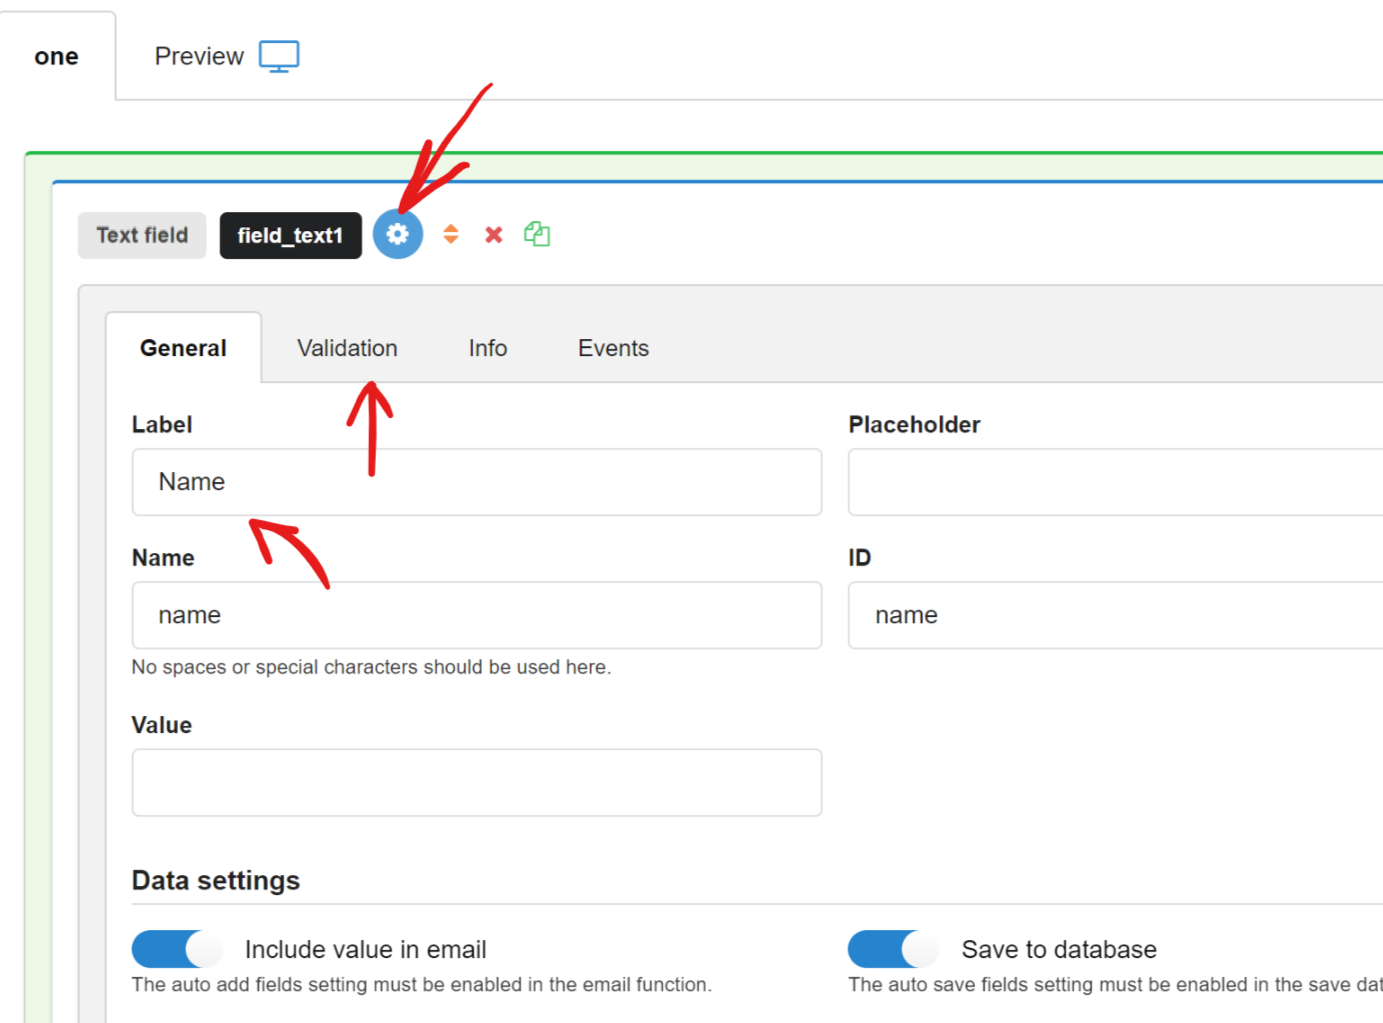
Click the blue cog icon to open the field settings and configure it, open few fields and change the field label or make it a required field.
You can also drag a "Multi fields" area to right section box, then drag more fields (or any of your existing fields using the yellow sort icon ) inside in order to have a multi field line.
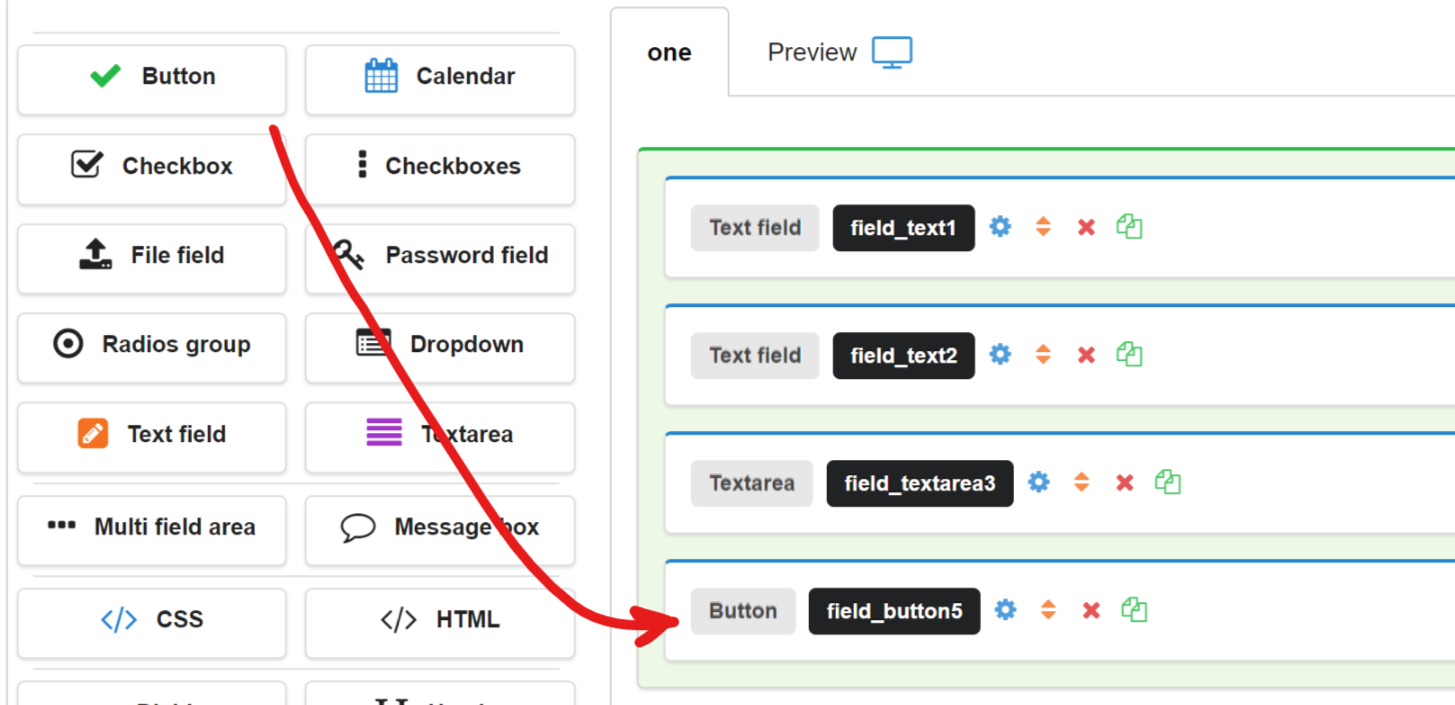
You will need to have at least one button in your form, drag a button element to the right side section.
Do you already have your form HTML code ?
If you have an existing form and you just want to use it in Chronoform6s then this is possible, drag an HTML element then open the settings area and paste your HTML code inside, you may also need have the CSS code associated with your HTML form placed inside a CSS element.
Sending emails using your contact form
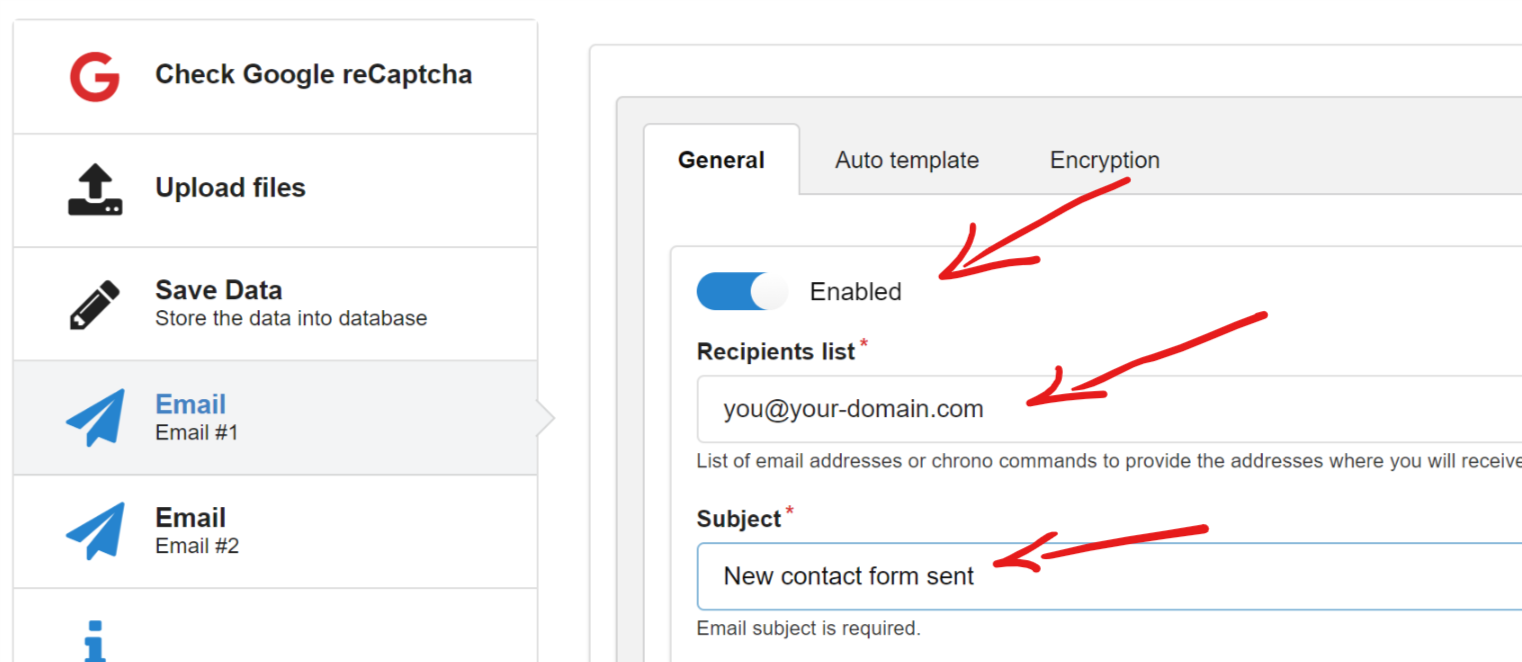
Click the "Setup" tab to open it, this is where you customize what your form is supposed to do after the button is clicked and the form is submitted.
In order to send an email, click the first "Email" tab on the left side to open the email settings, then on the right side, click the "Enabled" switch to turn on this email, enter your email address inside the "Recipients list" box, and enter your email "Subject".
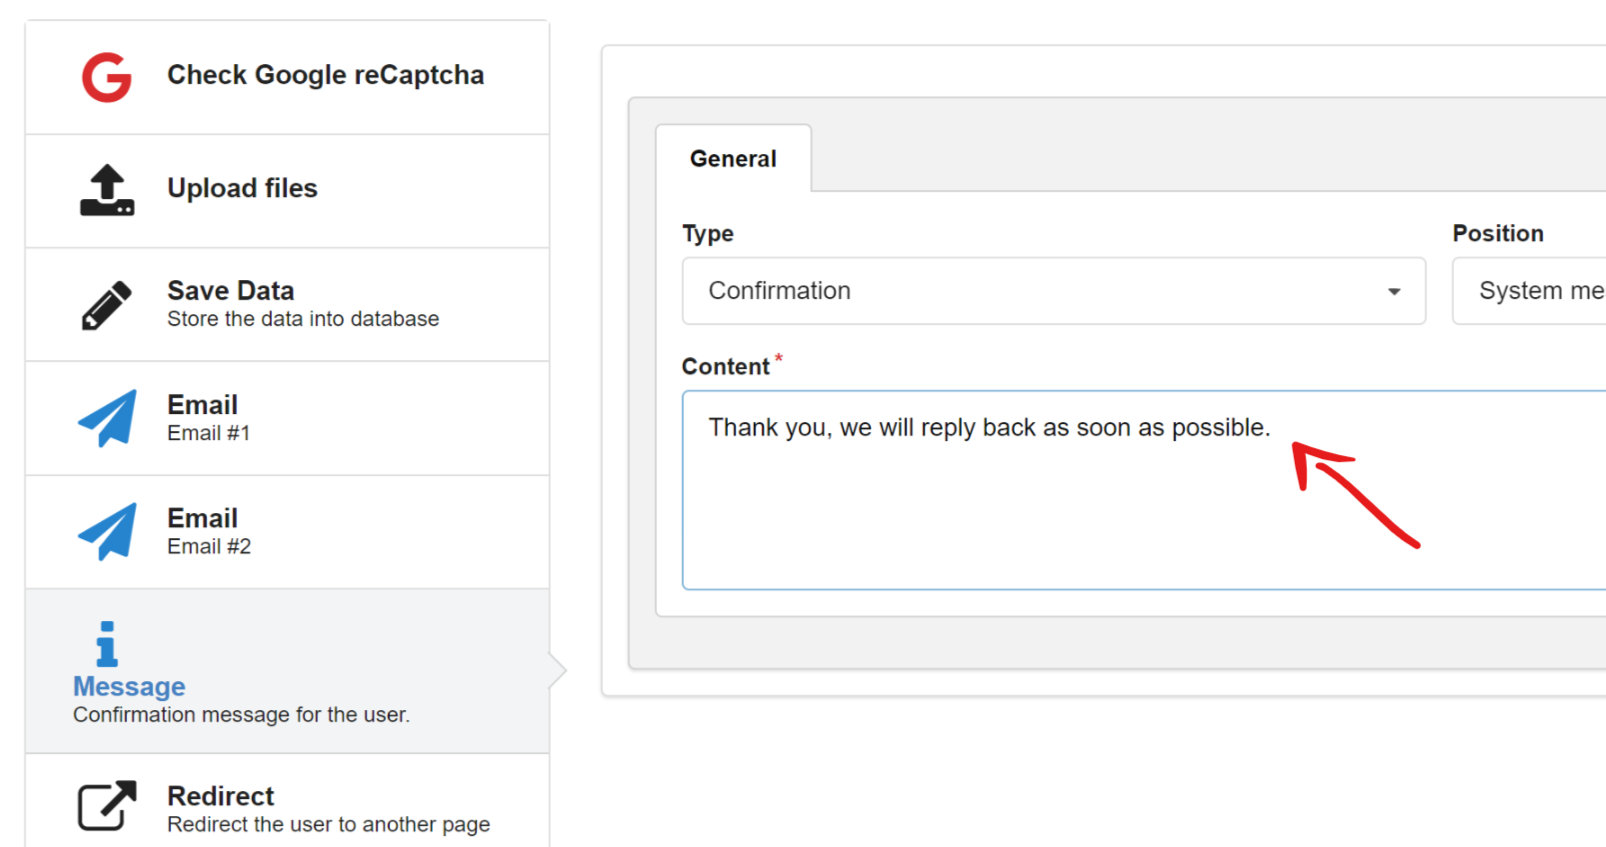
In most cases you would need to display a confirmation message to the user after the form is sent, click the "Message" tab on the left to open the message settings and add your own message in the "Content" box.
Click "Apply" or "Save" at the top left corner.
Congratulations, You have just built your first contact form using Chronoforms6
You can test your form in the admin area of your website using the "Preview" button at the top right corner.
You may also turn on/off the form debugger under Setup > Debugger to display some helpful information about the form setup actions.


Comments