Published:
If you need a more permanent record of the form submission than an email or a database entry then creating a PDF can be useful. There is a 'beta' version of a PDF action for ChronoForms created by a user that will let you do this.
This is a complex and powerful action, while you can get started very quickly getting exactly what you need may take some time and experimentation.
Getting started
The ChronoForms PDF action is a large file and is still in 'beta' so it is not included in the standard installation package. You can download it from the Chronoforms downloads page.
Once you have the action zip file install it into ChronoForms on your site using the Install Action icon on the ChronoForms Forms Manager toolbar. The action will then be available as the 'HTML to PDF' action in the TCPDF actions group on the form Actions tab.
To use the action drag a copy into the On Submit event of your form as the last action in the event.
We make it the last action because, by default, the action is set to show the PDF in the browser and this will take control of the form away from ChronoForms and prevent any further processing.
Leave all of the settings in the action at their default values except for the Content box on the Contents tab. Type 'Testing' in that box, save the form and test. You should see the PDF open in your browser - or you may see a download dialogue depending on the browser you are using. The PDF should have a title and footer and the one word 'Testing'.
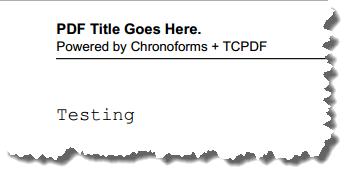
Now we have checked that the basic action is working correctly.
Adding content
The simplest way to add your form content to the PDF is to copy and paste in the HTML from an Email template. If you already have an Email template you can use that, if not, drag in an Email action, open it and click the 'Generate Auto Template' button on the Template tab. Select and copy the resulting HTML.
Here is the HTML from my simple contact form cleaned up a little:
<table cellpadding="5" cellspacing="5" border="0">
  <tr>
    <td><strong>Name</strong></td>
    <td>{name}</td>
  </tr>
  <tr>
    <td><strong>Email</strong></td>
    <td>{email}</td>
  </tr>
</table>
Close the Email action, open the HTML to PDF action again and paste the HTML into the Content box. Apply the action, Save the form and test again.
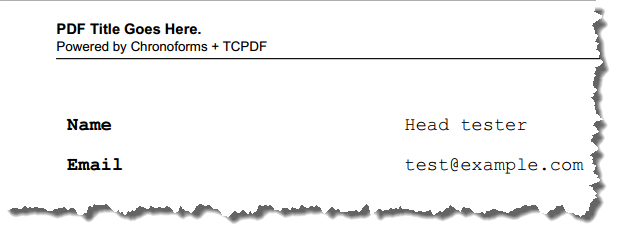
Now we have form data included in the PDF. From here on you can edit the HTML to include the content that you need. You can use {input_name} to add values from your form and you can also use PHP inside <?php ?> tags like this example:
<?php echo date('Y-m-d'); ?>
It is also possible to use Custom Code actions in your form to construct more complex conditional content to be included in the PDF. Add the content to a $form->data variable e.g. $form->data['my_pdf_a'] in the Custom Code action and then put {my_pdf_a} in the Content box of the HTML to PDF action.
Note: the TCPDF library that is used in the action will not accept all HTML; if you keep it simple then you will probably be OK. The TCPDF documentation is here but is not always friendly!
The Constants tab
The Constants tab is mostly about page layout:
You can set the fonts here (note that only three are available!). Font sizes are in points.
The margin settings are in millimetres: 25mm is about 1 inch.
The Image scale ratio is used to size image - but I don't know exactly how this works :-(
The Settings tab
Mode
The Mode defaults to View; this setting means that the action will be run when the On Submit event starts regardless of the sequence of other actions in the event. This is OK if you just want to use the Display Inline action for the PDF without displaying any othe information to the user. Emails and other actions will be run as usual but cannot use information from the HTML to PDF action.
Changing the Mode to Controller means that the action will be processed in the normal sequence of actions in the event. This is needed if you want to use the output from the HTML to PDF action e.g. to attach the PDF to an email.
Note: there is a bug in the current version of the action which prevents processing later actions. Please see the 'Using the file' section below for more information.
Document settings
The next block of settings add the Header, Footer and meta-data to the PDF. Note that these settings only take fixed/static values; you cannot include form data in them.
Document/File name
This option sets the PDF file name. If you leave it empty it is set to {form_name}_{datetime_string}.pdf e.g. demo_pdf_action_20130617071857.pdf;
You can add a fixed vaue here as a replacement but again you can only use fixed/static values.
Saving the file
The View option is set by default to 'Display inline', this will immediately show the PDF in the user's browser. This is quick and easy but not always helpful! Fortunately other options are available - the decriptions are from the TCPDF Output document
- Display Inline: send the file inline to the browser (default).
- Save to Server: save to a local server file
- Download: send to the browser and force a file download
- Save and Display inline: (both the above)
- Save and Download: (both the above)
- String: return the document as a string
Note: if you use Display in-line then after the form is submitted the PDF is shown; if you use Download then the form remains displayed. In neither case is a Thank you message shown. On Submit actions before the HTML to PDF action are run - and emails there are sent.
Page format
The last two options on the page set the Page Orientation - Portrait or Landscape; and the Page Format.
The Page Format defaults to the International standard A4 size but a wide range of other values is possible - but they must match one of the 280 'official' TCPDF values. Here is the full list:
// ISO 216 A Series + 2 SIS 014711 extensions
A0, A1, A2, A3, A4, A5, A6, A7, A8, A9, A10, A11, A12
// ISO 216 B Series + 2 SIS 014711 extensions
B0, B1, B2, B3, B4, B5, B6, B7, B8, B9, B10, B11, B12
// ISO 216 C Series + 2 SIS 014711 extensions + 2 EXTENSION
C0, C1, C2, C3, C4, C5, C6, C7, C8, C9, C10, C11, C12, C76, DL
// SIS 014711 E Series
E0, E1, E2, E3, E4, E5, E6, E7, E8, E9, E10, E11, E12
// SIS 014711 G Series
G0, G1, G2, G3, G4, G5, G6, G7, G8, G9, G10, G11, G12
// ISO Press
RA0, RA1, RA2, RA3, RA4, SRA0, SRA1, SRA2, SRA3, SRA4
// German DIN 476
4A0, 2A0
// Variations on the ISO Standard
A2_EXTRA, A3+, A3_EXTRA, A3_SUPER, SUPER_A3, A4_EXTRA, A4_SUPER, SUPER_A4, A4_LONG, F4, SO_B5_EXTRA, A5_EXTRA
// ANSI Series
ANSI_E, ANSI_D, ANSI_C, ANSI_B, ANSI_A
// Traditional , oose, North American Paper Sizes
USLEDGER, LEDGER, ORGANIZERK, BIBLE, USTABLOID, TABLOID, ORGANIZERM, USLETTER, LETTER, USLEGAL, LEGAL, GOVERNMENTLETTER, GLETTER, JUNIORLEGAL, JLEGAL
// Other North American Paper Sizes
QUADDEMY, SUPER_B, QUARTO, GOVERNMENTLEGAL, FOLIO, MONARCH, EXECUTIVE, ORGANIZERL, STATEMENT, MEMO, FOOLSCAP, COMPACT, ORGANIZERJ
// Canadian standard CAN 2-9.60M
P1, P2, P3, P4, P5, P6
// North American Architectural Sizes
ARCH_E, ARCH_E1, ARCH_D, BROADSHEET, ARCH_C, ARCH_B, ARCH_A
// --- North American Envelope Sizes ---
// - Announcement Envelopes
ANNENV_A2, ANNENV_A6, ANNENV_A7, ANNENV_A8, ANNENV_A10, ANNENV_SLIM
// - Commercial Envelopes
COMMENV_N6_1/4, COMMENV_N6_3/4, COMMENV_N8, COMMENV_N9, COMMENV_N10, COMMENV_N11, COMMENV_N12, COMMENV_N14
// - Catalogue Envelopes
CATENV_N1, CATENV_N1_3/4, CATENV_N2, CATENV_N3, CATENV_N6, CATENV_N7, CATENV_N8, CATENV_N9_1/2, CATENV_N9_3/4, CATENV_N10_1/2, CATENV_N12_1/2, CATENV_N13_1/2, CATENV_N14_1/4, CATENV_N14_1/2
// Japanese (JIS P 0138-61) Standard B-Series
JIS_B0, JIS_B1, JIS_B2, JIS_B3, JIS_B4, JIS_B5, JIS_B6, JIS_B7, JIS_B8, JIS_B9, JIS_B10, JIS_B11, JIS_B12
// PA Series
PA0, }
PA1, PA2, PA3, PA4, PA5, PA6, PA7, PA8, PA9, PA10
// Standard Photographic Print Sizes
PASSPORT_PHOTO, E, L, 3R, KG, 4R, 4D, 2L, 5R, 8P, 6R, 6P, 8R, 6PW, S8R, 4P, 10R, 4PW, S10R, 11R, S11R, 12R, S12R
// Common Newspaper Sizes
NEWSPAPER_BROADSHEET, NEWSPAPER_BERLINER, NEWSPAPER_TABLOID, NEWSPAPER_COMPACT
// Business Cards
CREDIT_CARD, BUSINESS_CARD, BUSINESS_CARD_ISO7810, BUSINESS_CARD_ISO216, BUSINESS_CARD_IT, BUSINESS_CARD_UK, BUSINESS_CARD_FR, BUSINESS_CARD_DE, BUSINESS_CARD_ES, BUSINESS_CARD_CA, BUSINESS_CARD_US, BUSINESS_CARD_JP, BUSINESS_CARD_HK, BUSINESS_CARD_AU, BUSINESS_CARD_DK, BUSINESS_CARD_SE, BUSINESS_CARD_RU, BUSINESS_CARD_CZ, BUSINESS_CARD_FI, BUSINESS_CARD_HU, BUSINESS_CARD_IL
// Billboards
4SHEET, 6SHEET, 12SHEET, 16SHEET, 32SHEET, 48SHEET, 64SHEET, 96SHEET
// Old European Sizes
// - Old Imperial English Sizes
EN_EMPEROR, EN_ANTIQUARIAN, EN_GRAND_EAGLE, EN_DOUBLE_ELEPHANT, EN_ATLAS, EN_COLOMBIER, EN_ELEPHANT, EN_DOUBLE_DEMY, EN_IMPERIAL, EN_PRINCESS, EN_CARTRIDGE, EN_DOUBLE_LARGE_POST, EN_ROYAL, EN_SHEET, EN_HALF_POST, EN_SUPER_ROYAL, EN_DOUBLE_POST, EN_MEDIUM, EN_DEMY, EN_LARGE_POST, EN_COPY_DRAUGHT, EN_POST, EN_CROWN, EN_PINCHED_POST, EN_BRIEF, EN_FOOLSCAP, EN_SMALL_FOOLSCAP, EN_POTT
// - Old Imperial Belgian Sizes
BE_GRAND_AIGLE, BE_COLOMBIER, BE_DOUBLE_CARRE, BE_ELEPHANT, BE_PETIT_AIGLE, BE_GRAND_JESUS, BE_JESUS, BE_RAISIN, BE_GRAND_MEDIAN, BE_DOUBLE_POSTE, BE_COQUILLE, BE_PETIT_MEDIAN, BE_RUCHE, BE_PROPATRIA, BE_LYS, BE_POT, BE_ROSETTE
// - Old Imperial French Sizes
FR_UNIVERS, FR_DOUBLE_COLOMBIER, FR_GRANDE_MONDE, FR_DOUBLE_SOLEIL, FR_DOUBLE_JESUS, FR_GRAND_AIGLE, FR_PETIT_AIGLE, FR_DOUBLE_RAISIN, FR_JOURNAL, FR_COLOMBIER_AFFICHE, FR_DOUBLE_CAVALIER, FR_CLOCHE, FR_SOLEIL, FR_DOUBLE_CARRE, FR_DOUBLE_COQUILLE, FR_JESUS, FR_RAISIN, FR_CAVALIER, FR_DOUBLE_COURONNE, FR_CARRE, FR_COQUILLE, FR_DOUBLE_TELLIERE, FR_DOUBLE_CLOCHE, FR_DOUBLE_POT, FR_ECU, FR_COURONNE, FR_TELLIERE, FR_POT
Note that you may well need to change the page margin settings on the Constants tab if you use a page size other than A4, LETTER or a similar size.
Using the file
If you use one of the View options that includes saving a copy of the file then you can, for example, attach the file to an email.
A bug - important!!
There is a bug in the original version of the action that may stop the form processing once the HTML to PDF action completes; this is appropriate if you want to serve the PDF immediately but no helpful if you want to use the PDF as an email attachment.
The fix is to edit the file /administrator/components/com_chronoforms/form_actions/tcpdf/cfaction_tcpdf.php. Near the end are these two lines:
$mainframe =& JFactory::getApplication();
$mainframe->close();
Replace them with these lines which make the close() conditional on the View setting so that it only runs when there is a Display Inline option chosen:
if ( $PDF_view == 'I' || $PDF_view == 'FI' ) {
  $mainframe =& JFactory::getApplication();
  $mainframe->close();
}
Output
The action will add the name of the saved pdf to the $form->data array using the name set in the 'File name in Data/Files array'
box. For example:
$form->data['cf_pdf_file'] => demo_pdf_action_20130617082547.pdf
Attach to an email
You can then use the name of this value, cf_pdf_file is the default, in an Email action after the HTML to PDF action.
The File data saved
The action also saves some data to the $form->files array which is used to find the details to attach the file. This can be useful if, for example, you want to include a link in an email. The saved data is:
$form->files['cf_pdf_file']['name'] => demo_pdf_action_20130617082547.pdf
$form->files['cf_pdf_file']['path'] => /some_path/components/com_chronoforms/pdf/demo_pdf_action/demo_pdf_action_20130617082547.pdf
$form->files['cf_pdf_file']['size'] => 0 // this is not set correctly
$form->files['cf_pdf_file']['link'] => http://example.com/components/com_chronoforms/pdf/demo_pdf_action/demo_pdf_action_20130617082547.pdf
Adding a link to an email or Thank you page
To add a link to an email or to a Thank you page you could use a Custom Code action after the HTML to PDF action and before the Email action with code like this:
<?php
$form->data['pdf_link'] = "<a href='{$form->files['cf_pdf_file']['link']}' >Click here</a>";
?>
Then you would add {pdf_link} to your Email template or Thank You page action.


Comments