In this tutorial we will see how to extend the articles list to include the Author's data from the Joomla! core users table using a One to One relationship (each Article has one Author).
The first step when working with more than one table is to have a unique Model ID for every table in the connection, the Model ID works as an alias for the table name in the SQL query and as a friendly key in the returned data array.
Let's give our content table a Model ID = "Article"

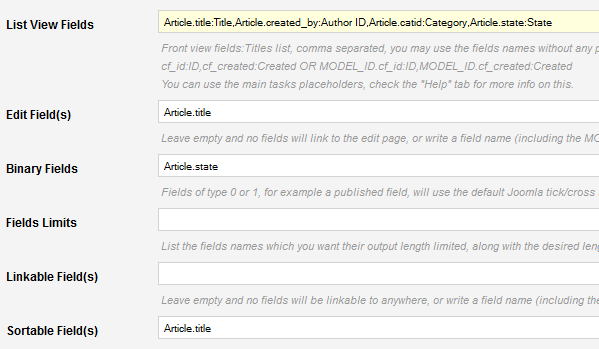
This change should affect our fields names under the "Frontend List Settings" tab as shown in the image below, all fields will have the new "Article." prefix, so instead of using "title", we should now use "Article.title". (Although it would still work fine without the prefix but for the main table only).
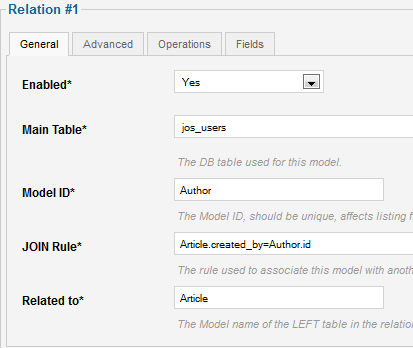
Time to add our new relation, let's go to the "Multi Table settings" tab and enable and configure the first relation box, Model IDs are obligatory here, we will give the users table a Model ID = "Author", we should also write the Join Rule, and since our content table has a relation with the users table using the "created_by" column, then the relation should be:
Article.created_by=Author.id
We should not forget to fill the "Related To" box as well, this relation is directly associated to the main connection's table, so let's write "Article".
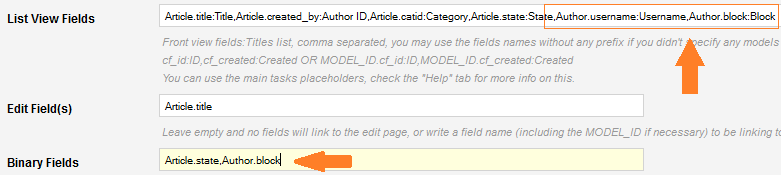
Cool, let's go back to the "Frontend List Settings" tab and add few more data retrieved by the new relation which we have just setup, let's add 2 new columns to our list: Author's username, Author's block status, and since the Author's block field is also a 1 OR 0 field, then let's add it to the Binary fields box:
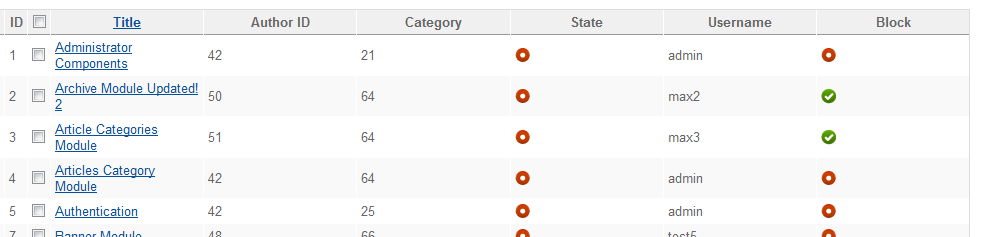
Let's save and check the new result:
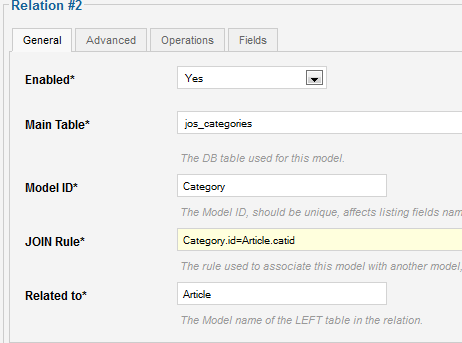
Cool, I will do the same for the "Category" field, instead of displaying the category id field, I would like to show the Category's title and remove the Author ID column, here is the new Category relation config:
And after few changes to the frontend list settings, here is the final frontend display:

I would also like to make my articles list sortable by the Category's title and the Author's username, so we can add both of them to the sortable fields box:

Please remember that only the main table and any tables in One To One relationship with the main table can be used for sortable fields.
And here is our final result:

There is also one feature which may come handy in some situations, let's assume that I have another connection called "categories", and I use it for listing and management of the categories table, how would I link my new "Category" fields to that connection, so I can click the category name to open correct record in the "categories" connection ?
This is one of the situations where you will need to use the "Linkable fields" box, here is how we should do the situation above:

As you can see, I have set the "Category.title" field to be linkable, then I setup the link structure:
- The task: "cc_edit_data", the default editing task for ChronoConnectivity.
- The connection name: "chronoconnection=categories", to open the categories connection.
- The record identifier: "cb" which is the default record id parameter for Connectivity.
- The return target: "return", when it exists, the connection will redirect to the encoded URL.


Comments