Overview
This comprehensive tutorial provides a detailed, five-step process for configuring ChronoForms v8 in Joomla or WordPress to save form submissions directly to a Google Sheet. It covers obtaining the Sheet ID and name, sharing the sheet, enabling the Google Sheets API, creating a service account, and configuring the write action within ChronoForms. The guide includes essential screenshots and explains how to make the Google Sheet editable by other users for seamless collaboration.
This complete guide shows exactly how to configure ChronoForms v8 Joomla forms to save submissions directly to Google Sheets, with all necessary screenshots.
We will also explain how to make your Google Sheet editable by others users.
5 steps to connect your Joomla or WordPress form to save data to your Google Sheet
Before starting the tutorial, make sure you have installed ChronoForms v8 form builder for Joomla or ChronoForms v8 form builder for WordPress
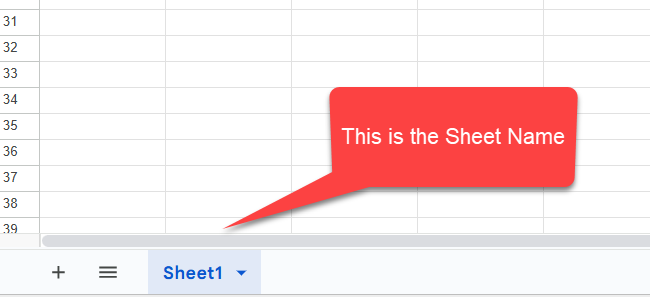
Step 1: Get the Sheet ID & Name from your Google Sheets interface
The Sheet ID can be found in the browser's address bar when you open your Sheet:

The Sheet Name can be found at the bottom:
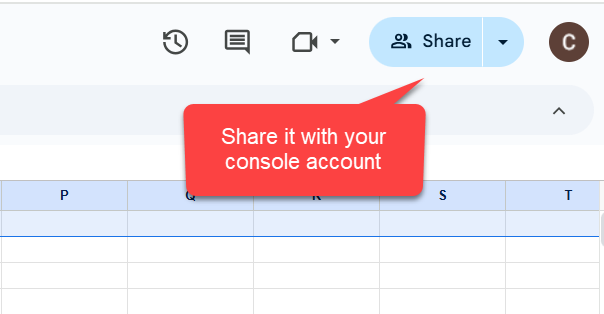
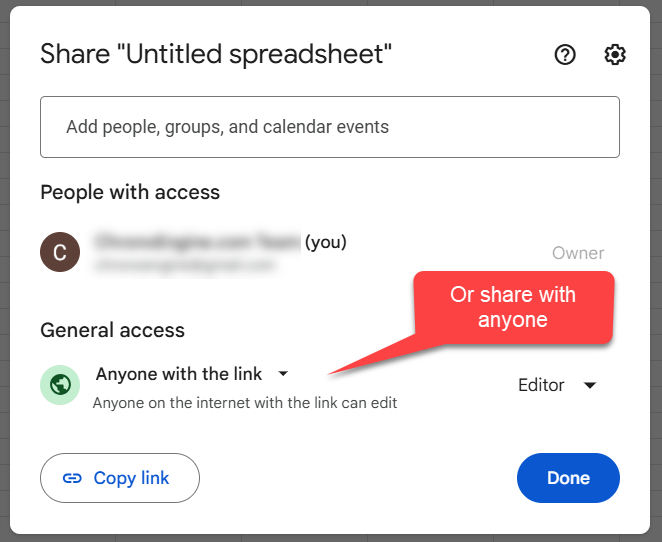
Step 2: Share the Google Sheet with Everyone or with your console account:
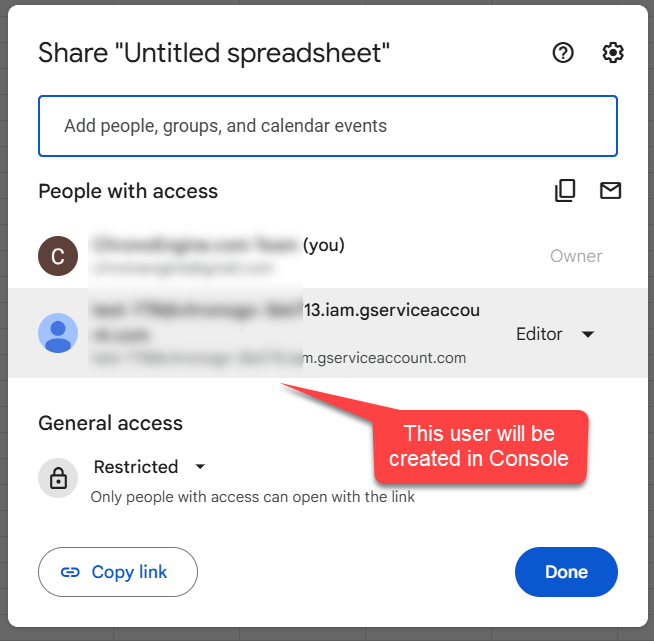
Next, the sheet must be shared with Everyone with a link or with a Google Console account (will be explained later**):
This is how it should be if you share with a Console account, the 2nd user should be created in the Google Console:
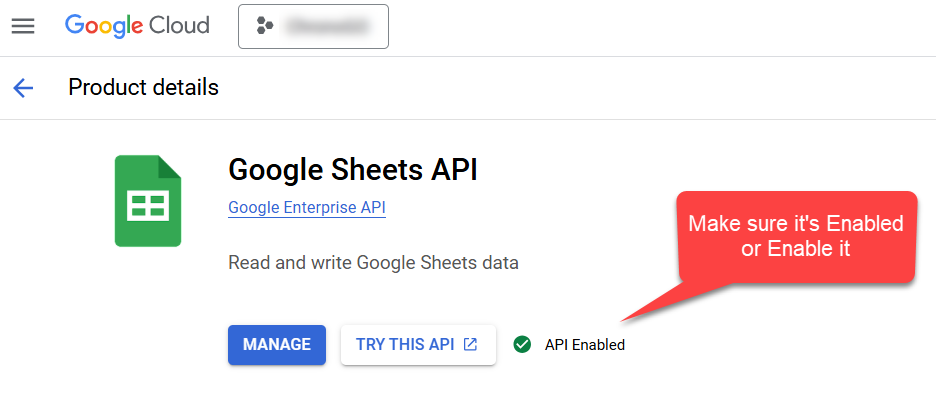
Step 3: Enable the Google Sheets API in your Google Cloud Console
In your Google Console, choose a project and search for Google Sheets API:

On the Google Sheets API page, Enable the service in your project or make sure it's already enabled:
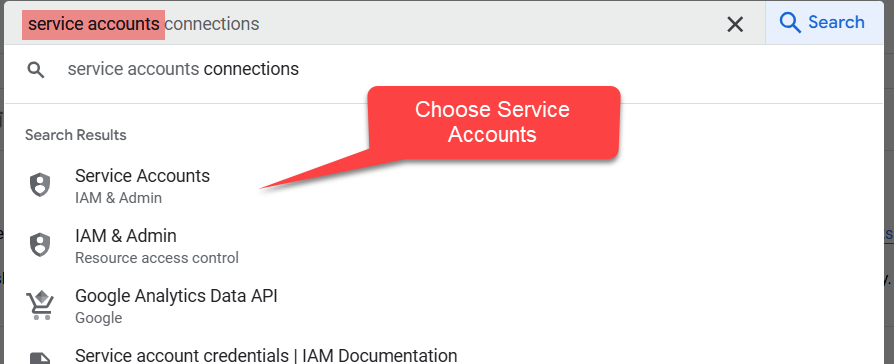
Step 4: Create a Google Cloud Service Account
Back to the Search page, type "service accounts" and choose the Service Accounts page:
Create a new service account or use an existing one:

Open the new created account page and go under Keys then click "Add Key" then "Create new key":

In the popup window choose JSON:
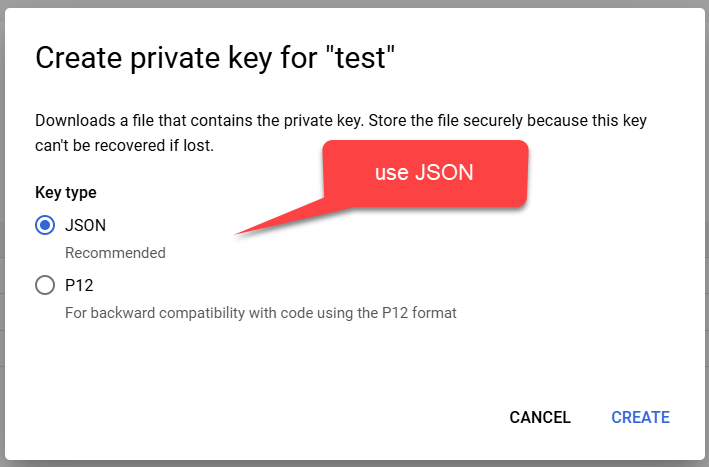
A JSON file will be downloaded, you will need to upload it to your web server, and use the path as in #3, my file was under the website's root and so we could use {path:root}/file-name
Step 5: Configure the Google Sheets Write action in your ChronoForms v8 Joomla form
This is how your Google Sheets write action should look like in order for it to save the Jooma form data to Google Sheets:
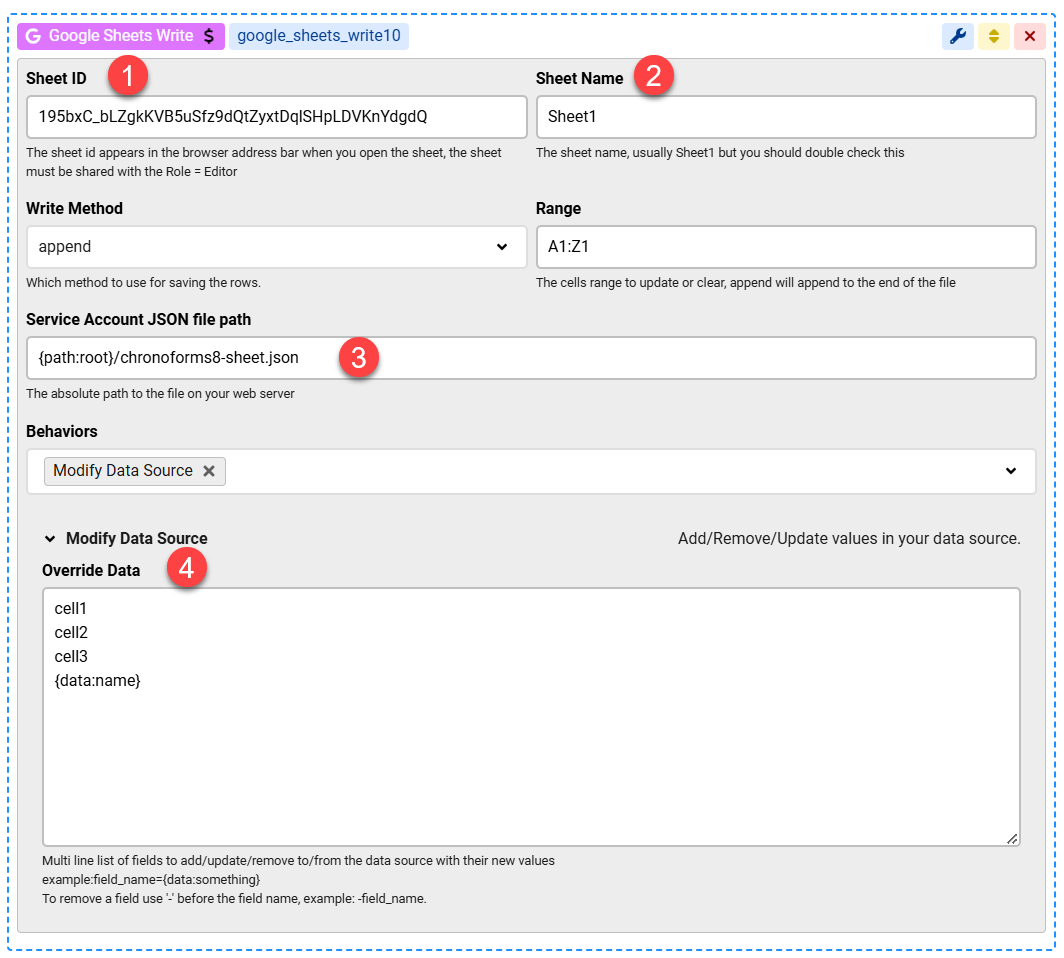
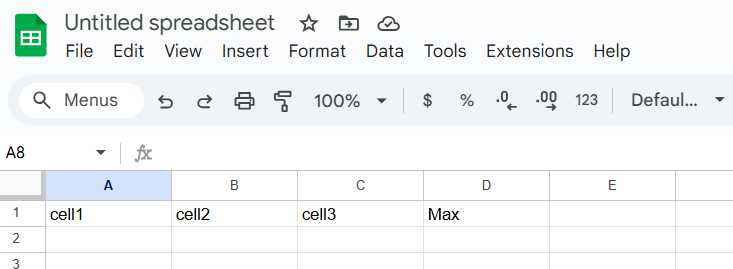
The values to be saved in 1 row are set in the Override Data box under "Modify data source", once we run the form, these values will be stored in a 1 row as shown below
That's it, your Joomla form can now store submissions in your live Google Sheet which can be shared with other users easily!
**if you need to share the sheet with the new create console account only instead of sharing it with anyone with the link then you need to copy the newly created account address to your Share dialog as shown earlier:


Comments