ChronoForms v5 includes a Google Spreadsheet Save action that will let you save your form results to a Google Docs spreadsheet. This FAQ has a simple example of using the action.
Important: the standard version of this action no longer works because Google made a change to the way they authorise users. You can download a beta version of an updated action here. Please advise me - Bob aka GreyHead if you find any bugs.
First, you need to set up the spreadsheet in Google Apps. Open a new Spreadsheet, give it a suitable name - I used 'CF test' - and add column names into row 1. In my test I used 'text1', 'text2' and 'text3'. That's all that is needed here.
Second create you form and use Array Names for the inputs that you need to save. I used the suggested 'GSheet' model ID and so my inputs are called GSheet[text1], GSheet[text2] and GSheet[text3].
Drag a copy of the Google Spreadsheet Save action into the On Submit event of the form in the Setup tab and Edit the action.
- Check that it is enabled
- Add your Google Apps username and password
- Add the Spreadsheet name e.g. 'CF test'
- Leave the Worksheet empty and the Data path as GSheet
Save and close the action; Save the form and test.
If you have the spreadsheet open when you submit the form you should see the new record inserted immediately.
If the submission isn't working add a Debugger action to the form On Submit event and see if you get helpful error messages shown from ChronoForms or from the Google Apps response.
Notes:
- You don't need to use a Data path/Model ID the submission will work correctly without but I recommend that you do if only for good housekeeping.
- You can use spaces in column names if you need them; but in this case please do use a Data Path/Model ID and check carefully what happens to the names if you want to use them in other ChronoForms processes.
- You do not have to save every column in the spreadsheet, only the columns with matching names will be saved.
- The data will be saved to the first empty row in the spreadhseet - this means that wile you can use formulae with the data they can only be added to new rows after the data is saved.
- You can pre-process or merge data using PHP in Custom Code actions provided that the final results are put into the $form->data array as a sub-array under the Data Path/Model ID you have chosen e.g. $form->data['GSheet']['text1'], $form->data['GSheet']['text2'], etc.
- Google removes underscores from parameter names so to save to a column names e.g. cb_phone the data sent needs to be named cbphone. If there are more columns with similar names e.g. cb phone, cbphone than Google will use cbphone_2, cb_phone3. You can see exactly what dat is being send by adding a Debugger action to your form after the GSheet Save [GH] action.
Setting up OAuth 2.0
The following is taken from a guide written by a beta-tester for the GSheet Export [GH] action (see the note above).
The Google side – enable the API, and create your connection
- Go to console.developers.google.com. You’ll arrive at the Dashboard.
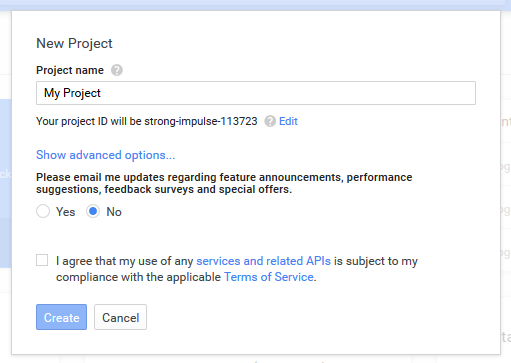
- Assuming you haven’t created a project before, on the top bar, you’ll see a dropdown menu called “Select a Project”. Click on that, and choose “Create a Project”.
- Give your project a name, then agree to the terms of service.
-
Click Create.

- The project will load. On the dashboard, click on the APIs title on the APIs window.
- Click on Google APIs.
- In the resulting screen, find the Google Apps APIs section, then click on Drive API.
- Enable the API.
- Now, on the left hand column, choose Credentials.
- Click on the Add Credentials drop down menu. Choose OAuth 2.0 client ID.
- Choose Web Application
- Give it a name
- In the Authorised JavaScript origins field, put in your web site URL. Leave the URI field empty.
- Click Create.
- Add another set of credentials. This time, choose Service Account.
- Choose P12.
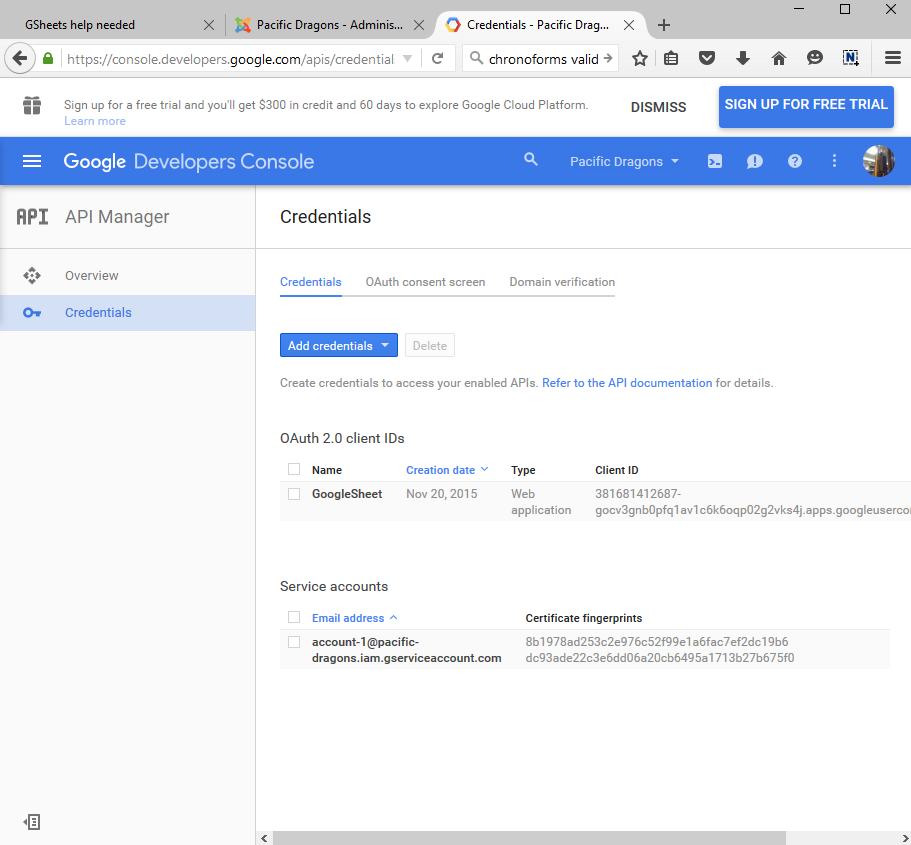
- Once you’re done, your credentials area should look like the below. You’ll need the client ID with the long code, the service account email address, and you’ll need to download the P12 file.

Create a Google Spreadsheet
- Next, create a new Google Spreadsheet, and share it with this Service Account email address. Your email account will probably get a notification saying that the email address is unreachable. Don’t worry about it.
- The first row of your worksheet should be populated with the column names. I strongly suggest you name column names with no spaces – it saves frustration. Spaces and underscores don’t seem to work.
Chronoforms – create form and connect
- Now, go to Chronoforms, create your form. I assume you know how to create a form, otherwise, Bob’s other guides can cover this.
- Note: in the Chronoforms form, name your fields as “GSheet[your field name from your Google Spreadsheet]”. I populated both the name and the ID field with this value – I couldn’t be bothered finding out which field needs to be populated as such.
-
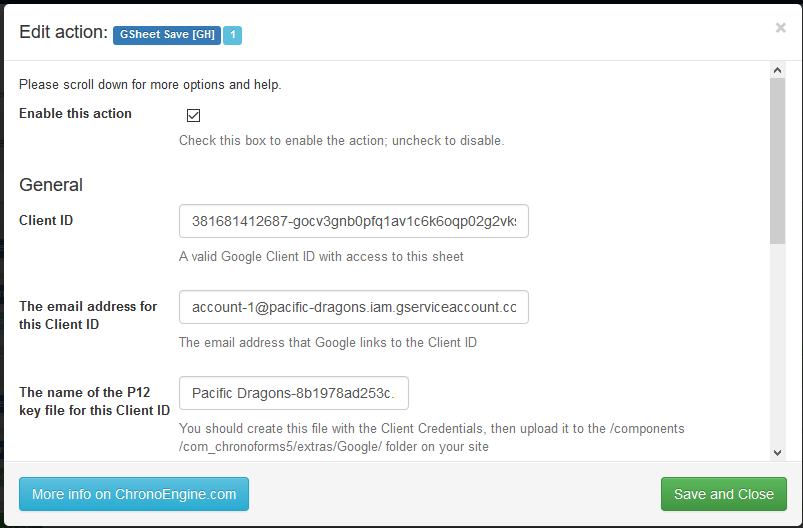
In the Setup screen, apart from everything else which normally happens with using Chronoforms, drag a GSheet Save [GH] action into your On Submit action. The configuration of this action are:
- Enable
- Client ID = the long string Client ID from your OAuth 2.0 credentials. In Google, you may notice another Client ID value in the Service Account – don’t use that one.
- Email address = the Service Account email address
- P12 file: you’ll need to upload this file first. Bob’s readme file from when you downloaded the action, that tells you where to put it. Once done, copy the name of the file and put it in this field.
- Sheet name = the name of the spreadsheet created earlier
- Worksheet name = the name of the worksheet within the spreadsheet
-
Data path = GSheet

- Test your form to see if everything works.


Comments: